[QEC Tutorial]
For the full tutorial, see Example: Digital Input/Output on QEC with Low-code.
Digital Input
With 86EVA and ArduBlock, using the EtherCAT digital input module to receive external signals and print them out through Serial Port.
Hardware
- QEC-M-01
- QEC-R11D0F: EtherCAT 16 Channel Digital Output Slave Module
- Others: Switch
Circuit
Same as Digital Output, please connect the EtherCAT Out network from QEC-M to the EtherCAT In network of QEC-R11DF0 first. This example will connect an external switch, using Pin8 of the QEC-R11DF0 as the receive signal pin:
- Vp power connection external switch
- Connect the external switch to Pin8+ of QEC-R11DF0
- Pin8- of QEC-R11DF0 is connected back to the GND of the Vp power supply
As shown in the figure.

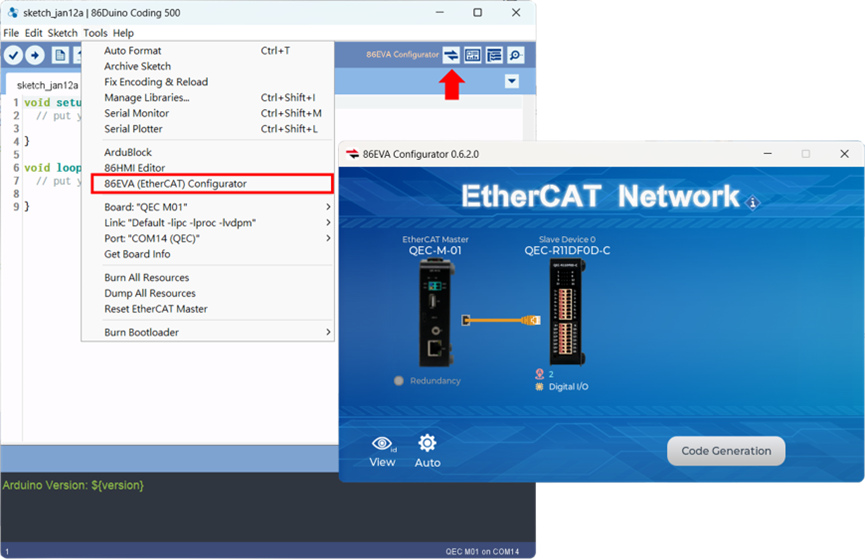
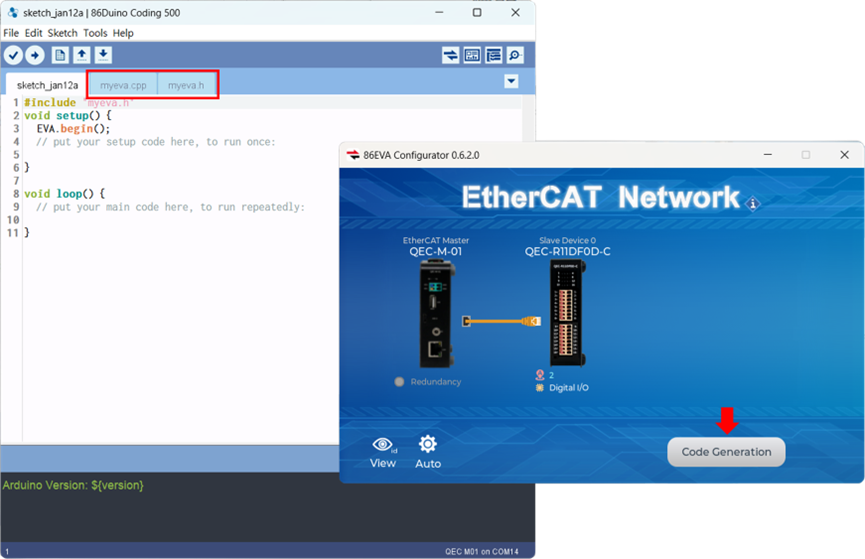
Step 1: 86EVA, EtherCAT Configuration
Go to the 86Duino Coding IDE, open the 86EVA tool, and configure EtherCAT.
Step 2: Set up the Virtual Arduino Pin and generate the code
In the screen of the Digital Input slave device, QECR11DF0D, set DI08 as Virtual Pin D0 as the pin selection for the subsequent ArduBlock.
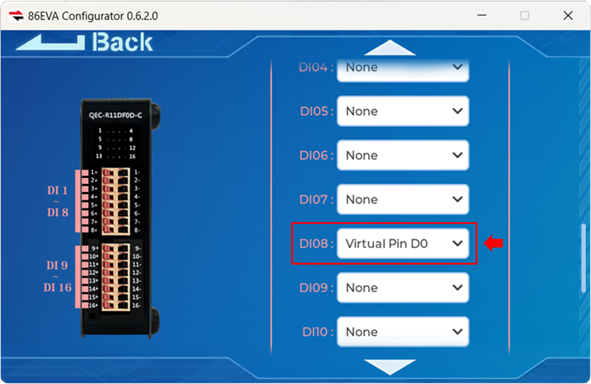
After completion, the 86EVA code can be generated.
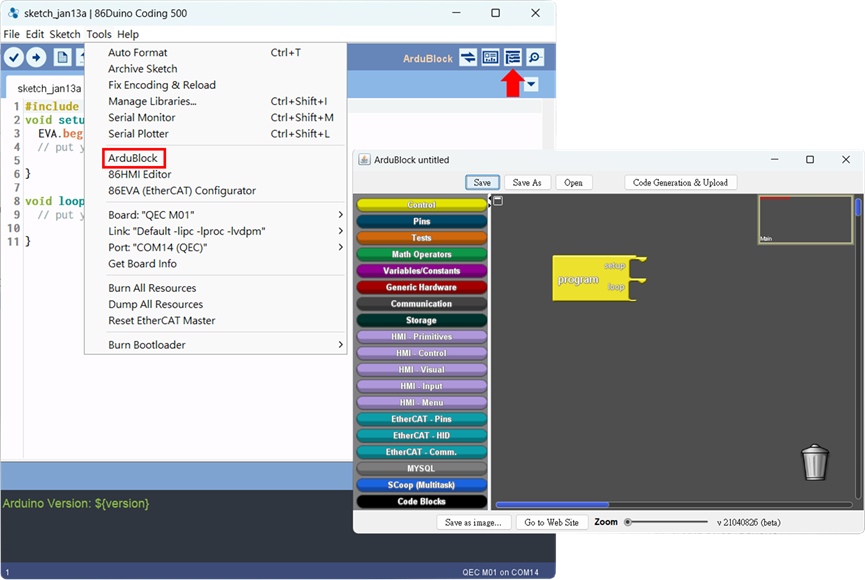
Step 3: ArduBlock setup
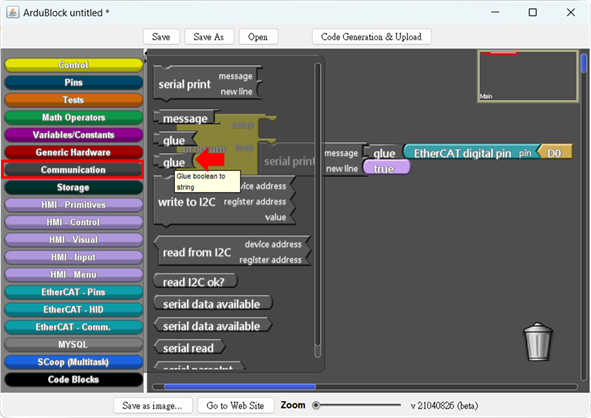
Open ArduBlock.
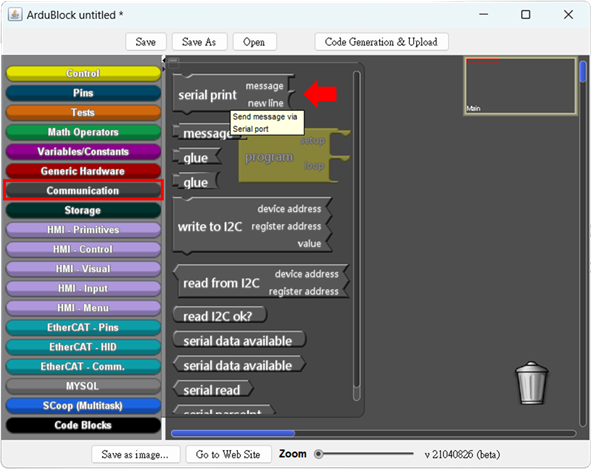
We need to print out the signal of Digital Read through the Serial Port, so we drag the serial print block of the Communication class into the program’s main loop.
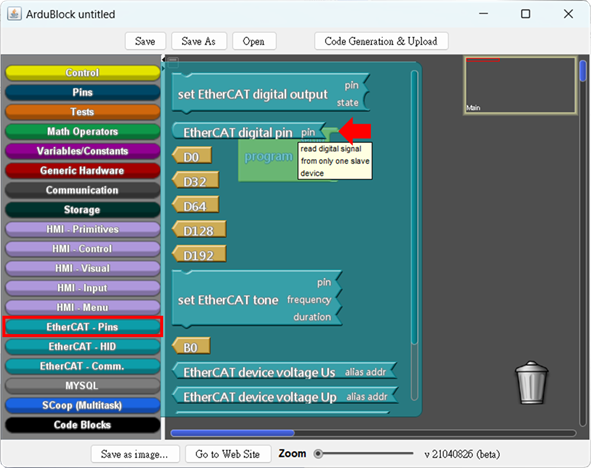
Let the EtherCAT digital pin block from the EtherCAT – Pins class into the main loop and set the pin to D0.
However, the original Serial Print’s message block cannot be directly combined with the EtherCAT digital pin block. So, it must be converted from Boolean to String via the glue block, and then it can be printed via Serial Port.
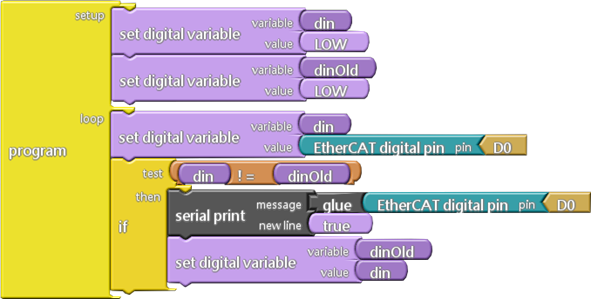
In this example, in order to prevent the Digital Input signal from being continuously output in the Serial Port, you can create two variables as the basis for reading the signal change and then print out the signal through the Serial Port after judging whether the received signal is different between the two times by if-else in the main program. In this way, you can use the 86EVA with ArduBlock to receive external digital signals using the EtherCAT digital input module and print them out via Serial Port.
Generate the code and upload it.

Learn More
You can find more information about the basic QEC applications in the EtherCAT application.
You can also explore Language or Libraries for a more detailed collection of 86Duino IDE programming.