In this tutorial, you will learn to use LVGL (Light and Versatile Graphics Library) example to create a graphical user interface on QEC-M-043T.
Goals:
- Understanding the structure to include LVGL Library.
- Building an example UI.
- Configuring the setup to display the UI.
Required hardware and Software
- QEC-M-043T
- 86Duino IDE 500
- USB to Micro-USB cable
The Light and Versatile Graphics Library
Graphical User interfaces are necessary. The Light and Versatile Graphics Library, also known as LVGL, is an open-sourced library that creates graphical user interfaces for microcontrollers and high-end processors.
The core LVGL library and the examples are directly available as 86Duino IDE 500 libraries.
Instructions
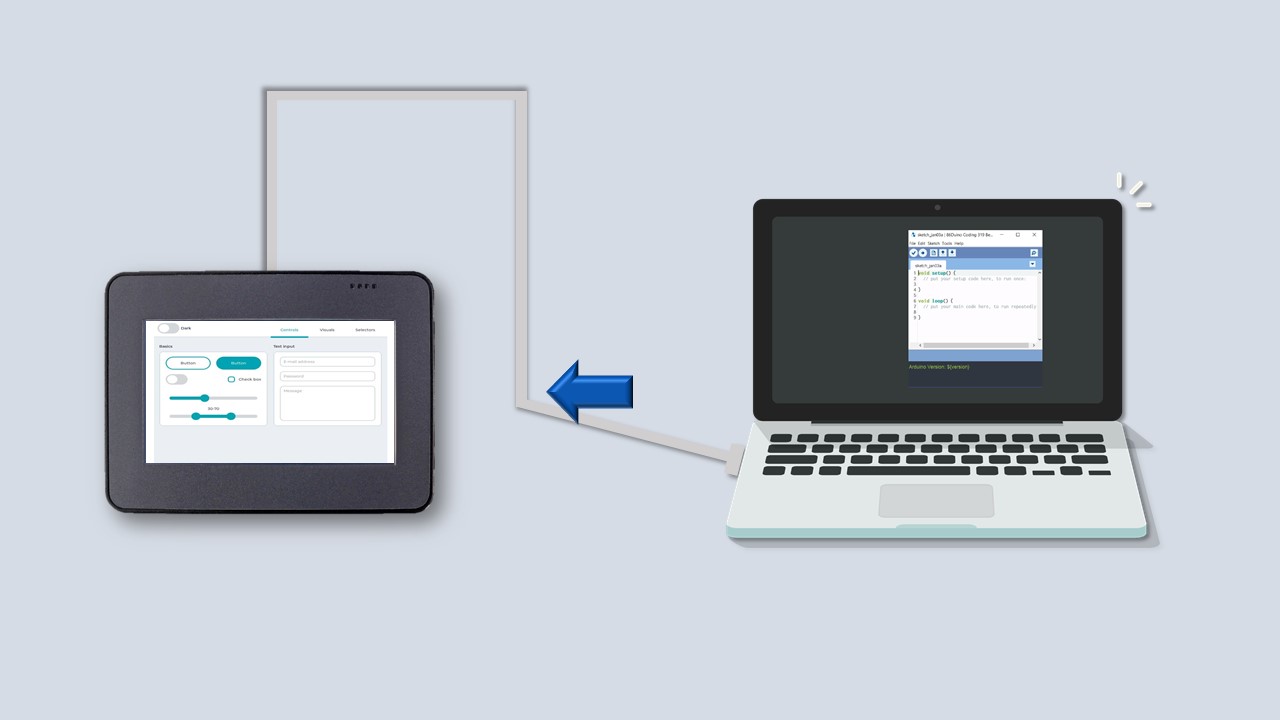
The setup for this tutorial requires you to connect QEC-M-043T and PC by the USB-to-MicroUSB cable, then upload the finished sketch file to the QEC-M-043T. The LVGL example will display on the QEC-M-043T.
The Basic Setup
Begin by plugging QEC-M-043T into the computer using a USB-to-MicroUSB cable and opening the 86Duino IDE 500. If this is your first time running 86Duino sketch files, we suggest you check out how to set up the QEC-M-043T for 86Duino before proceeding.
Open the LVGL Example
Select “QEC M043T” in the Tools -> Board menu first.
Next, select “Examples” in the File menu, go to LVGL86 -> LVGL and open the “DemoWidgets”.

LVGL DemoWidgets
There are 3 files in the ‘DemoWidgets’ example.
- DemoWidgets:
*.ino files are your main application files. - lv_demo_widgets.c:
*.c files are our C source code files in which our code is written and created by the user. - lv_demo_widgets.h:
*.h files are header files that are prewritten for our compiler.

Upload the Sketch
Below are the complete steps for uploading the sketch to QEC-M-043T. Upload the sketch to QEC-M-043T, and then you can see the display on it.
- Select “QEC M043T” in the Tools -> Board menu.
- Select the correct COM port in the Tools -> Serial Port menu. (Please open Device Manager -> Ports (COM & LPT) -> Prolific PL2303GC USB Serial COM Port (COMx) to make sure your COM number.)
- Click the “Upload” button to compile your code and upload it to the QEC-M-043T.
- Then, you can see the DemoWidgets example on QEC-M-043T after the upload is complete.
Conclusion
This tutorial shows how to use the LVGL example to create a graphical user interface on QEC-M-043T and also shows how to use the “task” feature of LVGL to run instructions recurrently.
Next Steps
Now that you know how to build a UI for a screen, you can connect the EtherCAT Slave device to QEC-M-043T for control with the UI.
Troubleshooting
Sketch Upload Troubleshooting
If you have trouble uploading the sketch, please ensure:
- Vs (Power of FGND/GND/VS) must be connected.
- Please check the COM port. You can open the Device Manager -> Ports (COM & LPT) -> Prolific PL2303GC USB Serial COM Port (COMx) to make sure your COM number.)
- Boards: “QEC M043T”
The text of the 86Duino reference is a modification of the Arduino reference and is licensed under a Creative Commons Attribution-ShareAlike 3.0 License. Code samples in the reference are released into the public domain.