[Tutorial]
We’re pleased to share new technical start guides that help engineers and system integrators get started quickly with the QEC-M-01 EtherCAT MDevice and Delta ASDA-B3 / ASDA-A2 AC Servo Motors and Drives.
These guides provide a step-by-step setup process, practical coding examples, and integration tips for two of the most widely used CiA 402 motion profiles — Cyclic Synchronous Position (CSP) and Profile Position (PP) — so you can bring a Delta servo axis online over EtherCAT with minimal effort.
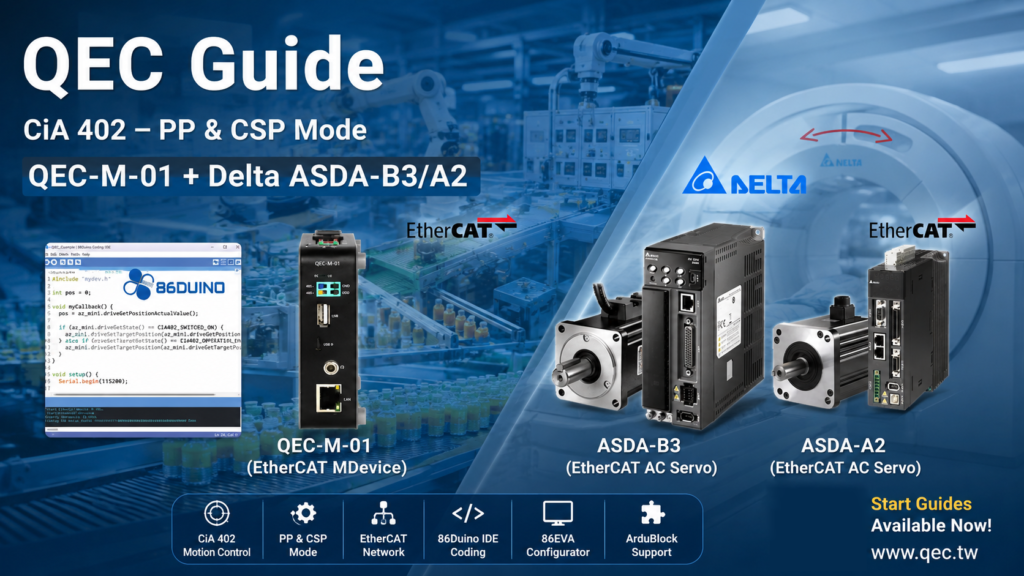
These guides provide a step-by-step setup process, practical coding examples, and integration tips, covering both CiA 402 CSP (Cyclic Synchronous Position) and PP (Profile Position) modes, so you can accelerate bring-up and reduce engineering time.
1. Highlights of the New Guide
The QEC-M-01 is a compact and powerful EtherCAT MDevice equipped with a real-time architecture. It runs the 86Duino Coding IDE and a full EtherCAT library, letting developers configure the network, map PDOs, and command CiA 402 drives using familiar Arduino-style setup() / loop() code. Combined with Delta’s ASDA servo family, it provides a fast path from wiring to motion.
1.1 Delta ASDA-B3 / ASDA-A2 (Why Delta ASDA?)
The Delta ASDA-B3 and ASDA-A2 are widely deployed AC servo motors and drives with a built-in EtherCAT interface that is compliant with the CiA 402 motion profile. Both are well suited to compact, cost-sensitive automation where reliable closed-loop positioning is required.
Key points for EtherCAT users:
- CiA 402 over EtherCAT — both drives expose standard CiA 402 objects and support PP and CSP operation, so the same QEC-M-01 application logic works across either model.
- Wide power range — the ASDA-B3 supports single/three-phase 200–230 V (≤3 kW) and three-phase 380–400 V (1–7.5 kW); the ASDA-A2 supports single/three-phase 200–230 V across the 200 W–3 kW range.
- High-resolution feedback for accurate, stable positioning, with auto-tuning to simplify commissioning.
- Built-in regenerative resistor sufficient for most applications, with the option to add an external resistor for high-inertia loads.
- Safety and protection — the ASDA-B3 provides an STO (CN10) input that must be active to enable the drive, plus CN1 I/O for ORG and POT/NOT limit switches used in homing and motion protection.
Learn more on the Delta ASDA-B3 and ASDA-A2 product pages.
1.2 Advantages of the Start Guides
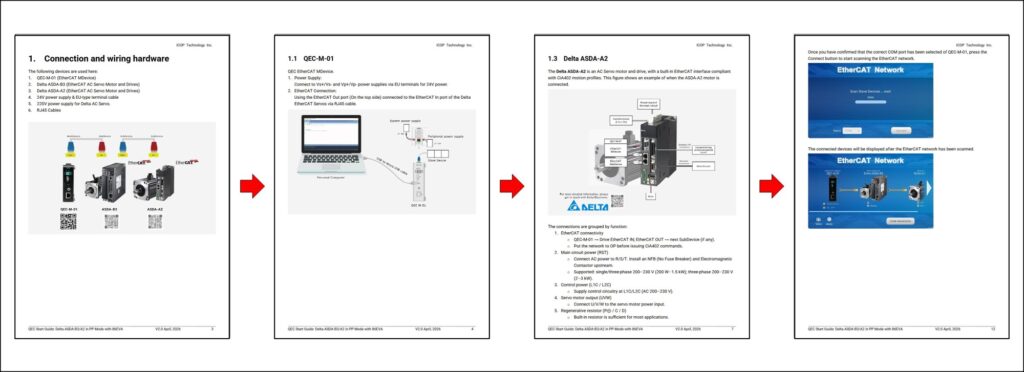
- Step-by-step setup guide: wiring, EtherCAT network bring-up, and the recommended parameter checklist for each drive.
- Programming examples (CSP / PP): practical, ready-to-run code snippets and control-flow examples to help you implement motion quickly.
- Integration tips & troubleshooting: notes for typical field issues — drive-enable sequence, STO bridging during development, alarm handling, and recovering a QEC-M environment via 86EVA (Bootloader, EtherCAT firmware, and EtherCAT tool updates).
2. Start Using QEC-M-01 with Delta ASDA-B3/A2 AC Servo
Whether you are a newcomer or an experienced developer, these guides provide the support you need to get a Delta servo axis moving. The examples below control two drives at once — the ASDA-B3 and the ASDA-A2 — on a single EtherCAT network, with:
- EtherCAT Cycle Time: 1 millisecond
- EtherCAT Mode:
ECAT_SYNC - Distributed Clock (DC): enabled, following the cycle time
In both examples the EthercatMaster object (master) represents the QEC-M-01, while the EthercatDevice_CiA402 objects represent the Delta ASDA-B3 and ASDA-A2 drives.
2.1 Profile Position (PP) Mode
The following program sets two ASDA drives into CiA 402 Profile Position (PP) mode. In setup() it initializes the network, attaches each drive by SubDevice index, enables DC, selects PP mode, transitions to OPERATIONAL, enables the motors, and configures the motion profile (type, velocity, acceleration, deceleration). In loop() a simple state machine moves each axis to +10,000,000 counts, waits for the target, moves back to −10,000,000 counts, and repeats — using pp_Run() to issue moves and pp_IsTargetReached() to confirm completion.
#include "Ethercat.h"

EthercatMaster master;
EthercatDevice_CiA402 motor[2];
int pp_state[2];

void setup() {
  Serial.begin(115200);
  Serial.print("Begin: ");
  Serial.println(master.begin());

  for (int i = 0; i < 2; i++) {
    Serial.print("Motor: ");
    Serial.println(motor[i].attach(i, master));
    motor[i].setDc(1000000);
    motor[i].setCiA402Mode(CIA402_PP_MODE);
  }

  Serial.print("Start: ");
  Serial.println(master.start(1000000, ECAT_SYNC));

  for (int i = 0; i < 2; i++) {
    Serial.print("Enable: ");
    Serial.println(motor[i].enable());
    motor[i].pp_SetMotionProfileType(0);   // Linear ramp (trapezoidal profile)
    motor[i].pp_SetVelocity(1000000);
    motor[i].pp_SetAcceleration(1000000);
    motor[i].pp_SetDeceleration(1000000);
  }
}

void loop() {
  for (int i = 0; i < 2; i++) {
    Serial.print("Motor"); Serial.print(i); Serial.print(": ");
    Serial.println(motor[i].getPositionActualValue());
    switch (pp_state[i]) {
      case 0:
        if (motor[i].pp_Run(10000000) == 0)
          pp_state[i]++;
        break;
      case 1:
        if (motor[i].pp_IsTargetReached())
          pp_state[i]++;
        break;
      case 2:
        if (motor[i].pp_Run(-10000000) == 0)
          pp_state[i]++;
        break;
      case 3:
        if (motor[i].pp_IsTargetReached())
          pp_state[i] = 0;
        break;
    }
  }
}
After uploading, open the Serial Monitor in the 86Duino IDE (match the baud rate). On a successful EtherCAT configuration each status prints 0 and the drives report Enable: 0, followed by the live position of each motor.
2.2 Cyclic Synchronous Position (CSP) Mode
The following program sets the Delta ASDA-A2 and ASDA-B3 into CiA 402 CSP mode. Motion is generated inside a 1 ms cyclic callback (myCallback): the callback reads each drive’s actual position, holds position while the drive is in CIA402_SWITCHED_ON, and once it reaches CIA402_OPERATION_ENABLED it advances the target position by 1000 counts per cycle for smooth, synchronized motion. The main loop() simply prints the current positions.
#include "Ethercat.h"
#define CYCTIME 1000000

EthercatMaster master;
EthercatDevice_CiA402 ASDA_A2;
EthercatDevice_CiA402 ASDA_B3;
int A2_pos = 0;
int B3_pos = 0;

void myCallback() {
  // Check the state of the first drive (ASDA_A2) and update its position
  A2_pos = ASDA_A2.driveGetPositionActualValue();
  int stateA2 = ASDA_A2.driveGetState();
  if (stateA2 == CIA402_SWITCHED_ON) {
    ASDA_A2.driveSetTargetPosition(ASDA_A2.driveGetPositionActualValue());
  } else if (stateA2 == CIA402_OPERATION_ENABLED) {
    ASDA_A2.driveSetTargetPosition(ASDA_A2.driveGetTargetPosition() + 1000);
  }

  // Check the state of the second drive (ASDA_B3) and update its position
  B3_pos = ASDA_B3.driveGetPositionActualValue();
  int stateB3 = ASDA_B3.driveGetState();
  if (stateB3 == CIA402_SWITCHED_ON) {
    ASDA_B3.driveSetTargetPosition(ASDA_B3.driveGetPositionActualValue());
  } else if (stateB3 == CIA402_OPERATION_ENABLED) {
    ASDA_B3.driveSetTargetPosition(ASDA_B3.driveGetTargetPosition() + 1000);
  }
}

void setup() {
  Serial.begin(115200);
  while (!Serial);
  Serial.println(master.begin());

  Serial.println(ASDA_A2.attach(0, master));
  ASDA_A2.setDc(CYCTIME);
  ASDA_A2.driveSetMode(CIA402_CSP_MODE);

  Serial.println(ASDA_B3.attach(1, master));
  ASDA_B3.setDc(CYCTIME);
  ASDA_B3.driveSetMode(CIA402_CSP_MODE);

  master.attachCyclicCallback(myCallback);
  Serial.println(master.start(CYCTIME, ECAT_SYNC));
  delay(100);

  Serial.print("ASDA_A2 Enable: ");
  Serial.print(ASDA_A2.driveEnable());
  Serial.print(", ASDA_B3 Enable: ");
  Serial.println(ASDA_B3.driveEnable());
  delay(1000);
}

void loop() {
  Serial.print("A2 Pos: ");
  Serial.print(A2_pos);
  Serial.print("B3 Pos: ");
  Serial.println(B3_pos);
}
On a successful EtherCAT configuration the Serial Monitor prints four 0 values plus ASDA_A2 Enable: 0 and ASDA_B3 Enable: 0, then streams the live position of both motors.
3. Complete Guides
If you’d like to dig deeper, the full step-by-step guides — including wiring photos, parameter checklists, PDO mapping, and graphical-tool workflows — are available below:
CSP Mode:
PP Mode:
- Delta ASDA-B3/A2 (PP mode) – Coding
- Delta ASDA-B3/A2 (PP mode) – Coding with 86EVA
- Delta ASDA-B3/A2 (PP mode) – Coding with 86EVA and ArduBlock
We will continue to deliver robust and innovative EtherCAT automation platforms for smarter, faster machine integration. For more info and sample requests, please write to info@icop.com.tw, call your nearest ICOP Branch, or contact our Worldwide Official Distributor.