Develop 86Duino / QEC applications directly in Visual Studio Code with the PlatformIO extension. This preview provides the complete 86Duino build environment as PlatformIO packages: DJGPP GCC 8.3 toolchain, 86Duino Arduino core and libraries (synced with 86Duino Coding IDE 501), v86dude uploader, 86EVA EtherCAT configurator, and 86HMI editor.
- Supports all 13 86Duino / QEC boards
- One-command project scaffolding (new-project.ps1)
- Board / COM-port selection, full firmware upload, and board reset from within VS Code
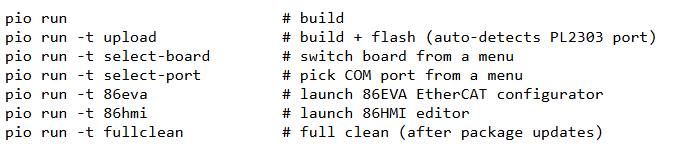
- Launch 86EVA and 86HMI as PlatformIO targets (pio run -t 86eva / 86hmi)
Refer to the bundled QUICK_START guide (PDF) for installation instructions.
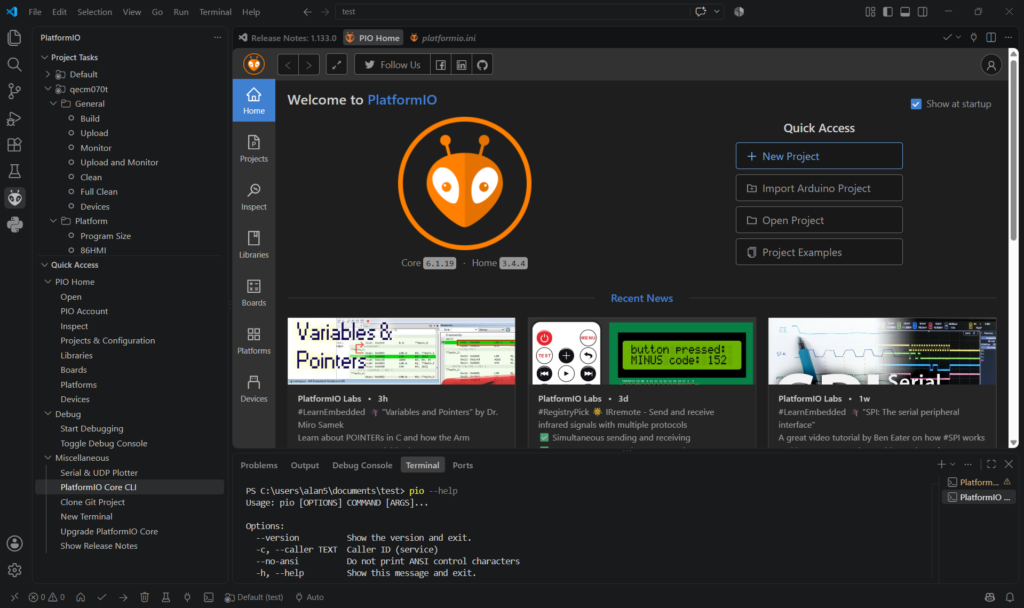
Requirements:
- Windows 10/11
- VS Code with the PlatformIO IDE extension installed
- Windows Developer Mode enabled (Settings → Privacy & security → For developers).
1. Install (once per machine)
Download the package and unzip it to a stable location (not Desktop or Downloads), e.g. C:\86duino-pio\PlatformIO-86Duino-501\. Then, in VS Code, open the PlatformIO Core CLI terminal (Ctrl+Shift+P → PlatformIO: Open PlatformIO Core CLI) and run:
cd C:\86duino-pio\PlatformIO-86Duino-501
Set-ExecutionPolicy -Scope Process Bypass -Force # only if scripts are blocked
.\scripts\install.ps1
Wait for Installation complete!.
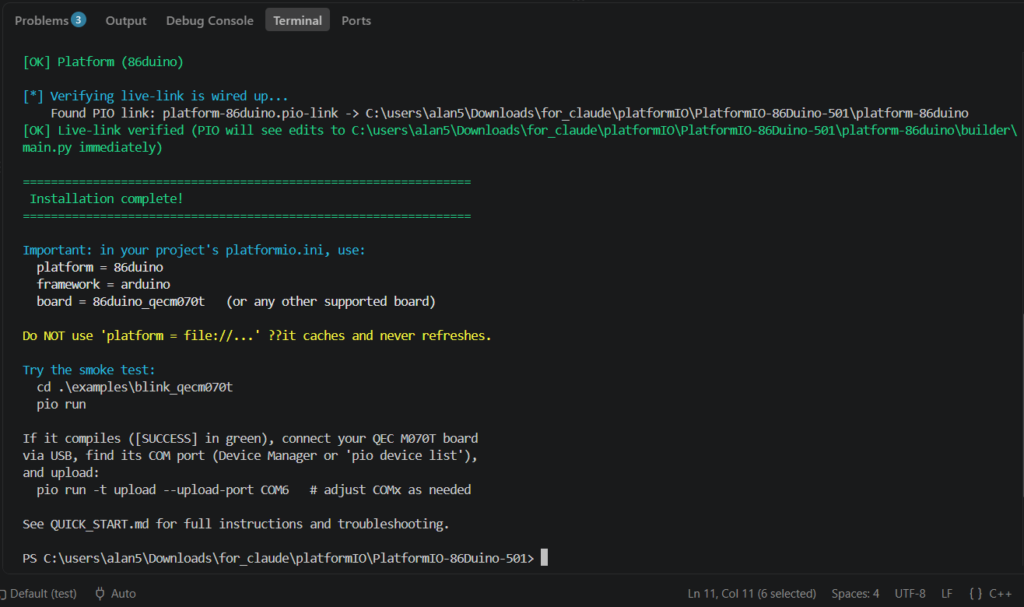
Done — the platform, toolchain, libraries, 86EVA, and 86HMI are now registered with PlatformIO.
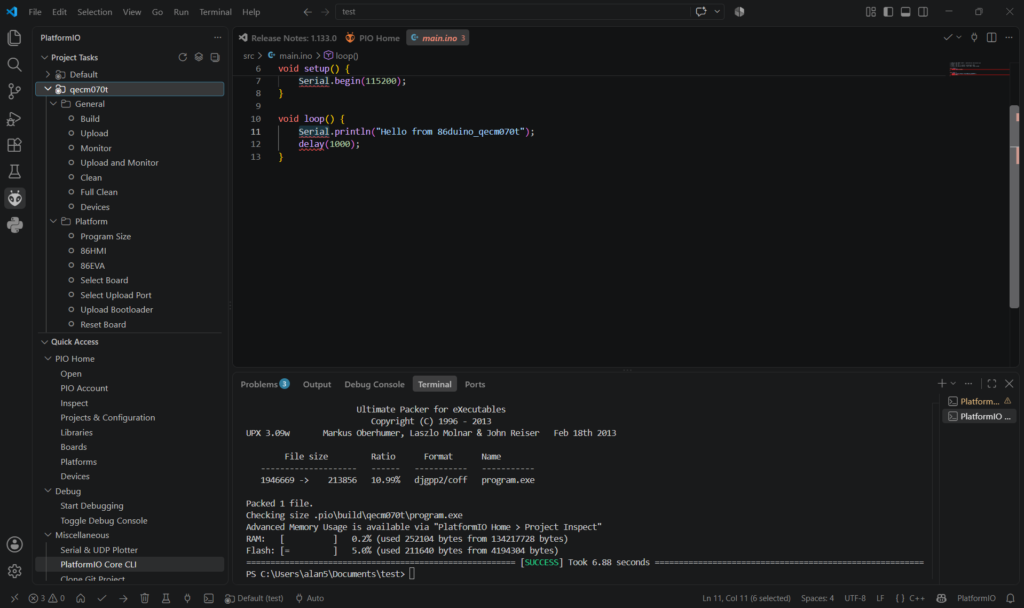
2. Build and flash the example
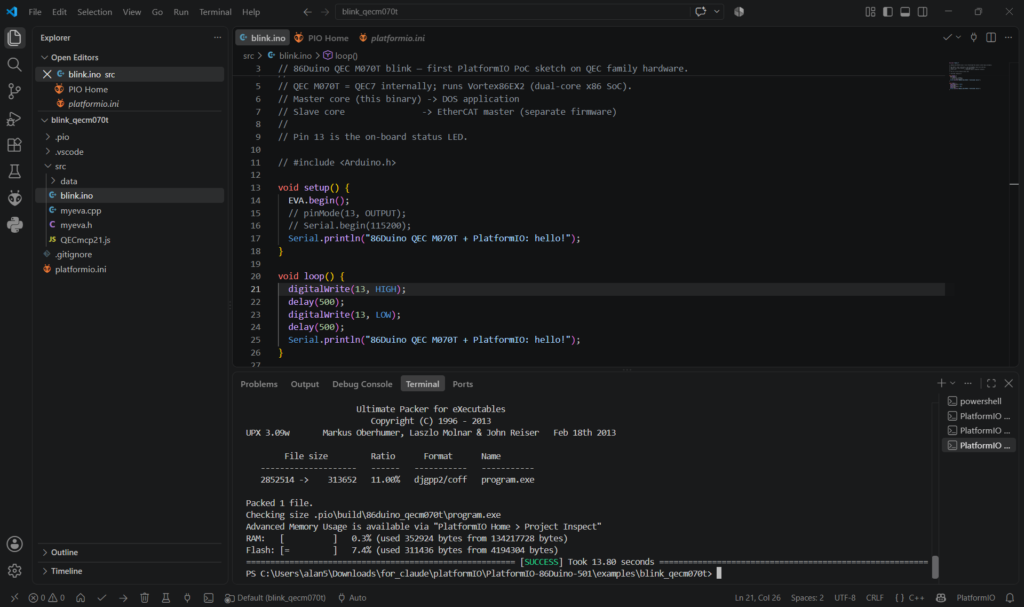
cd .\examples\blink_qecm070t
pio run # build only — expect [SUCCESS]
pio run -t upload --upload-port COM6 # flash (adjust COMx; see Device Manager)
The LED on pin 13 starts blinking.
To watch serial output: pio device monitor --port COM6 --baud 115200 (Ctrl+C to exit).
3. Create your own project
cd C:\86duino-pio\PlatformIO-86Duino-501
Set-ExecutionPolicy -Scope Process Bypass -Force # only if scripts are blocked
.\scripts\new-project.ps1
Three questions:
- project name
- board (menu of all 13)
- open in VS Code
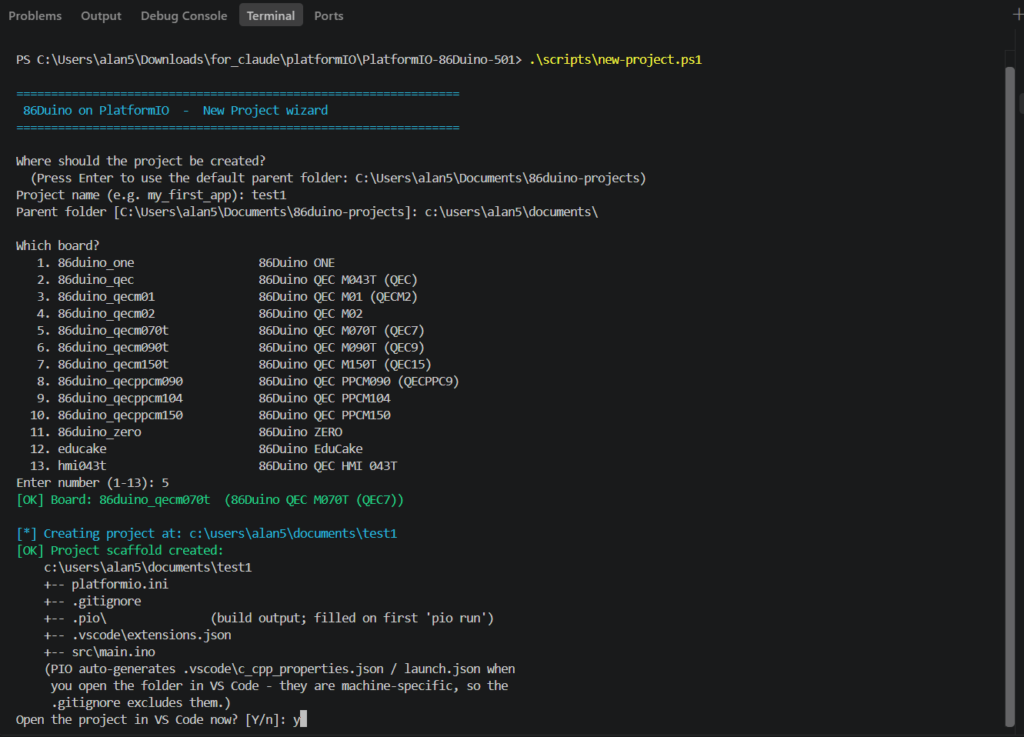
And you get a ready-to-build project with platformio.ini and src\main.ino pre-filled. All bundled libraries (EtherCAT, Motion86, Modbus, LVGL86, …) work with a plain #include — no configuration needed.
4. Handy commands
5. Need more?
The QUICK_START guide (PDF) covers everything else: step-by-step installation with expected outputs, the full command reference, custom targets (board reset, bootloader upload), library resolution details, supported board list, and a complete troubleshooting section.
This is a preview release; feedback is welcome at info@qec.tw or via the contact form.