透過 PlatformIO 擴充套件,直接在 Visual Studio Code Code 中開發 86Duino/QEC 應用程式。此預覽版將完整的 86Duino 建置環境以 PlatformIO 套件形式提供:DJGPP GCC 8.3 工具鏈、86Duino Arduino core 與函式庫(與 86Duino Coding IDE 501 同步)、v86dude 上傳工具、 86EVA EtherCAT 設定工具,以及 86HMI 編輯器。
- 支援全部 13 款 86Duino/QEC 開發板
- 一鍵式專案建立(new-project.ps1)
- 在 VS Code 內即可選擇開發板/COM 埠、完整韌體上傳,以及開發板重置
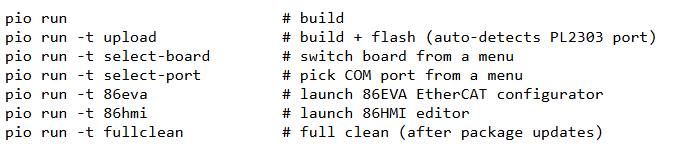
- 將 86EVA 與 86HMI 作為 PlatformIO 目標啟動(pio run -t 86eva / 86hmi)
安裝說明請參閱隨附的 QUICK_START guide (PDF) 。
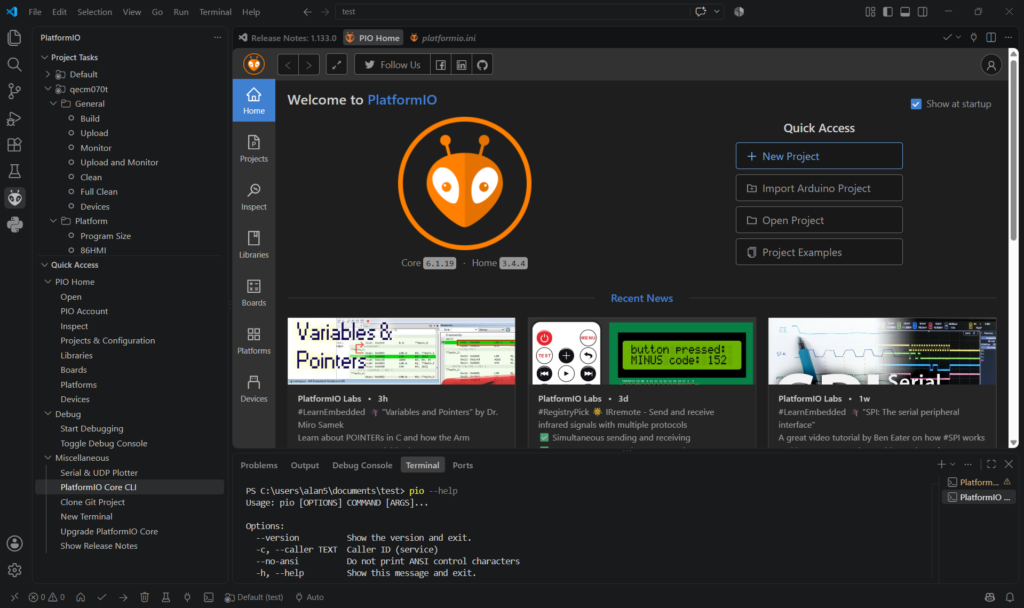
需求條件:
- Windows 10/11
- 已安裝 PlatformIO IDE 擴充套件的 VS Code
- 已啟用 Windows 開發人員模式 (設定 → 隱私權與安全性 → 開發人員專用)。
1. 安裝(每台電腦一次)
下載套件 and unzip it to a stable location (not Desktop or Downloads), e.g. C:\86duino-pio\PlatformIO-86Duino-501\. Then, in VS Code, open the PlatformIO Core CLI terminal (Ctrl+Shift+P → PlatformIO: Open PlatformIO Core CLI) and run:
cd C:\86duino-pio\PlatformIO-86Duino-501
Set-ExecutionPolicy -Scope Process Bypass -Force # only if scripts are blocked
.\scripts\install.ps1
等待出現 Installation complete!。
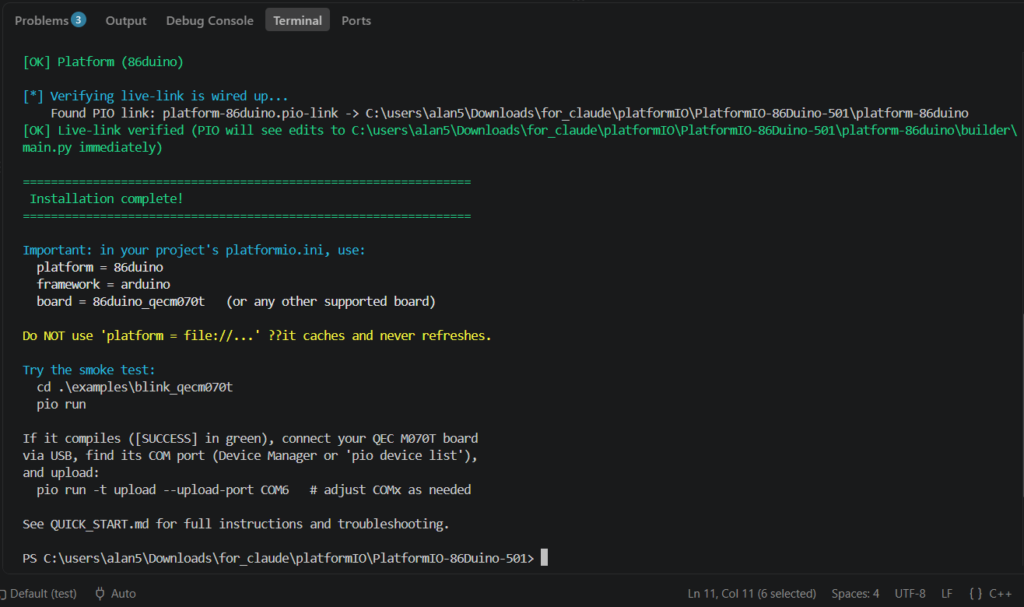
完成——平台、工具鏈、函式庫、86EVA 與 86HMI 現已註冊到 PlatformIO。
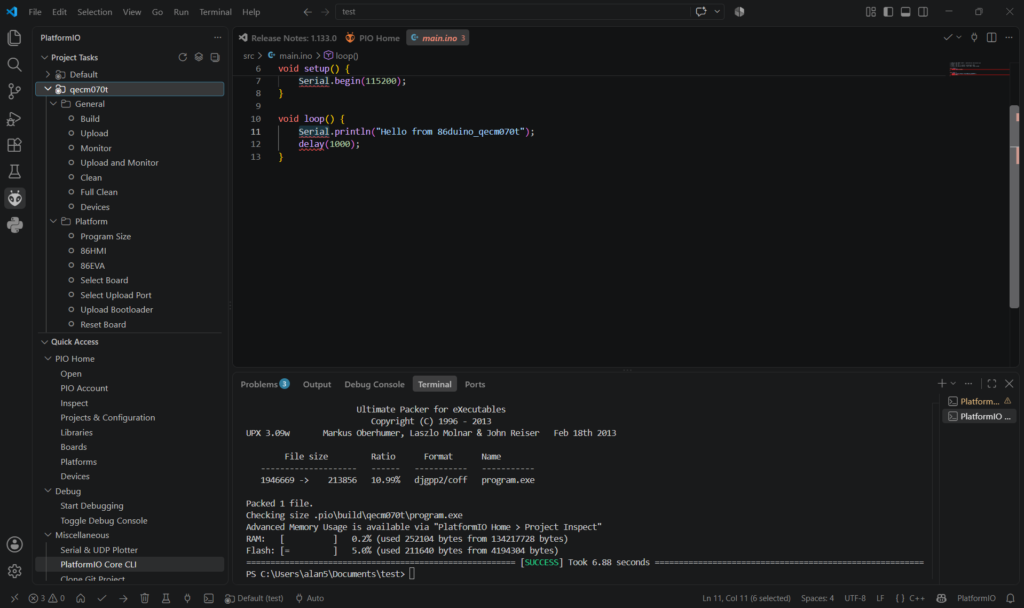
2. 建置並燒錄範例
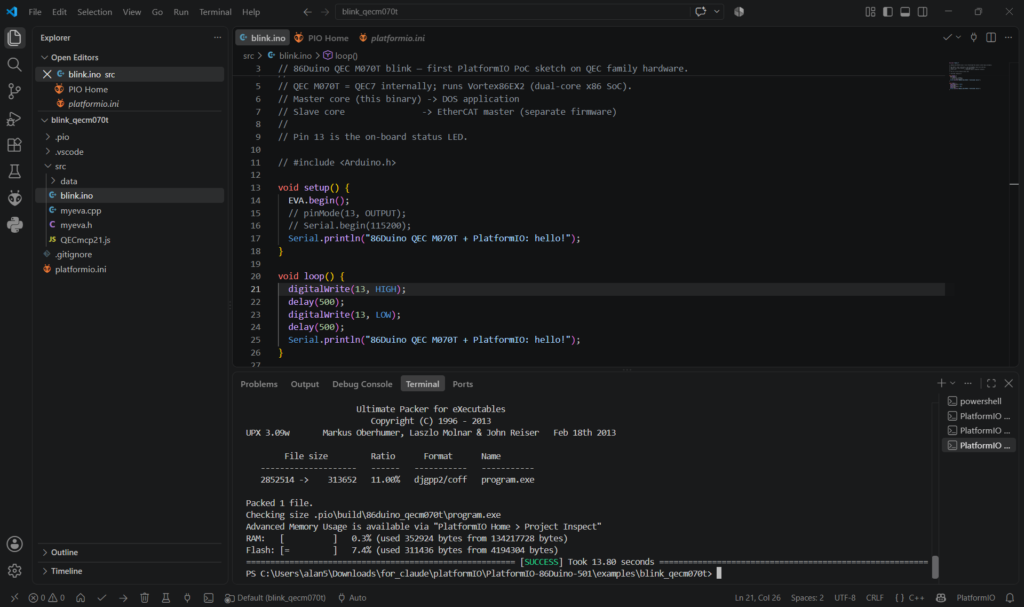
cd .\examples\blink_qecm070t
pio run # build only — expect [SUCCESS]
pio run -t upload --upload-port COM6 # flash (adjust COMx; see Device Manager)
腳位 13 上的 LED 會開始閃爍。
若要檢視序列埠輸出: pio device monitor --port COM6 --baud 115200 (按 Ctrl+C 離開)。
3. 建立你自己的專案
cd C:\86duino-pio\PlatformIO-86Duino-501
Set-ExecutionPolicy -Scope Process Bypass -Force # only if scripts are blocked
.\scripts\new-project.ps1
三個問題:
- 專案名稱
- 開發板(全部 13 款的選單)
- 在 VS Code 中開啟
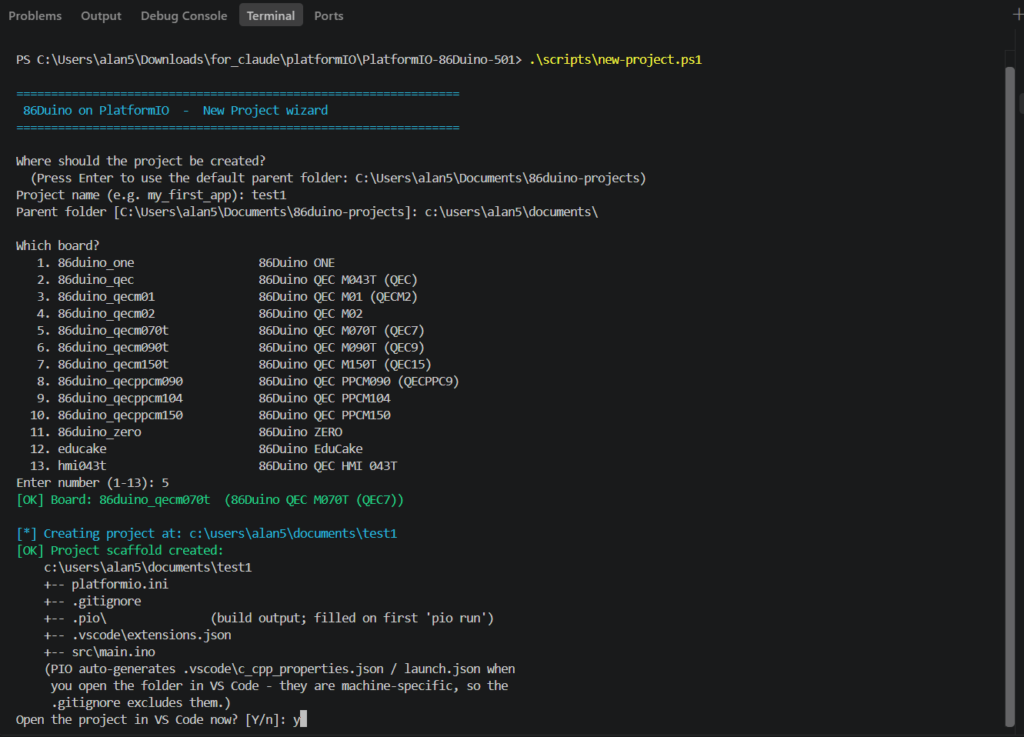
接著你就會得到一個可直接建置的專案,platformio.ini 與 src\main.ino 都已預先填好。所有隨附的函式庫(EtherCAT、Motion86、Modbus、LVGL86…)只要一個單純的 #include 即可使用——無需任何設定。
4. 常用指令
5. 需要更多資訊?
這個 QUICK_START guide (PDF) 涵蓋其餘所有內容:附預期輸出的逐步安裝、完整的指令參考、自訂目標(開發板重置、bootloader 上傳)、函式庫解析細節、支援的開發板清單,以及完整的疑難排解章節。
這是預覽版;歡迎透過 info@qec.tw 或聯絡表單提供意見回饋。