[Tutorial]
We’re pleased to share new technical start guides that help engineers and system integrators get started quickly with the QEC-M-01 EtherCAT MDevice and the Panasonic A6B Series EtherCAT AC Servo Motor & Driver.
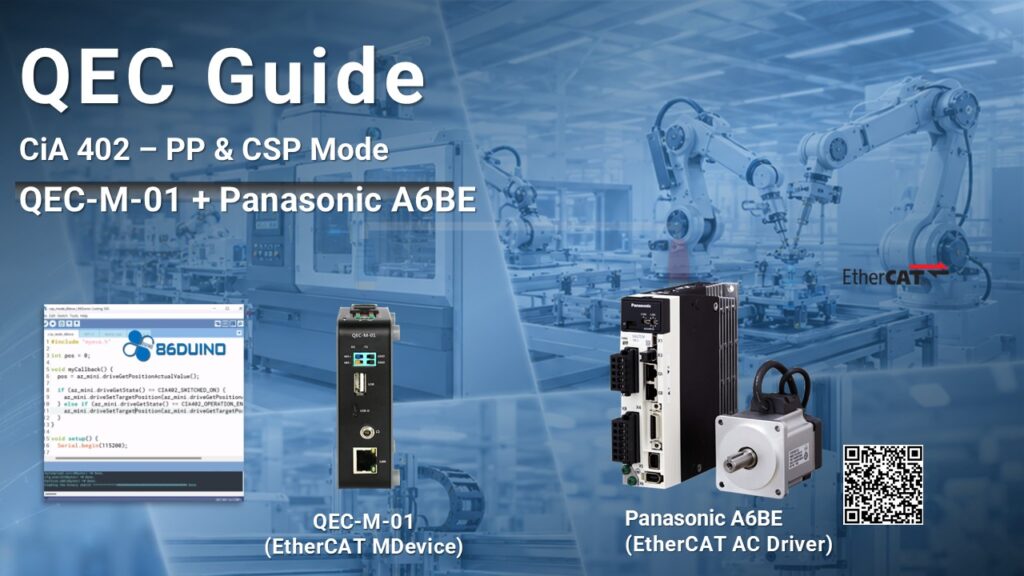
These guides provide a step-by-step setup process, practical coding examples, and integration tips for running the Panasonic A6B in both Cyclic Synchronous Position (CSP) and Profile Position (PP) modes.
1. Highlights of the New Guide
The QEC-M-01 is a compact and powerful EtherCAT MDevice equipped with a real-time architecture. Combined with the 86Duino Coding IDE and its EtherCAT Library, it lets you bring up an EtherCAT network and drive a CiA 402 servo with just two functions — setup() for one-time configuration and loop() for the cyclic main program.
1.1 Panasonic A6B Series (Why Panasonic A6B?)
The Panasonic A6B Series is a high-performance, integrated EtherCAT AC Servo Motor & Driver that exposes standard CiA 402 objects over EtherCAT, so the same QEC-M-01 workflow applies whether you run PP or CSP.
Key points for EtherCAT users:
- CiA 402 over EtherCAT — the A6B exposes standard CiA 402 objects and supports both PP and CSP operation, so the same QEC-M-01 code base works across modes with only a mode change.
- Integrated servo driver — main power input (XA), control power input (XA1/XA2), and motor/regenerative-resistor connector (XB) are combined in a single compact driver for a 200–220 V AC supply.
- High-resolution feedback — the A6 encoder interface (X6) provides accurate, stable positioning, with Panasonic auto-tuning to simplify commissioning.
- Daisy-chain EtherCAT ports — EtherCAT Input (X2A) and EtherCAT Output (X2B) let you connect the drive inline and extend the network to additional SubDevices.
- Safety and protection — a Safe Torque Off (STO) interface (X3) must be active to enable the drive, plus an I/O signal interface (X4) for sensors and alarm handling, LED status indicators, and a rotary switch for the station alias (ID).
Learn more on the Panasonic MINAS A6B product pages.
1.2 Advantages of the Start Guides
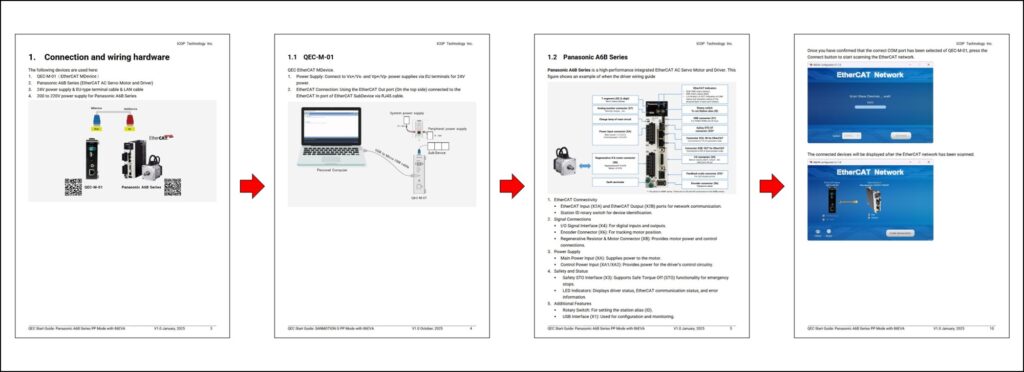
- Step-by-step setup guide: wiring, EtherCAT network bring-up, and the recommended parameter checklist for the drive.
- Programming examples (CSP / PP): practical, ready-to-run code snippets and control-flow examples to help you implement motion quickly, in both hand-written code and 86EVA low-code form.
- Integration tips & troubleshooting: notes for typical field issues — drive-enable sequence, STO bridging during development, and QEC-M environment updates.
2. Start Using QEC-M-01 with Panasonic A6B AC Servo
Whether you are a newcomer or an experienced developer, these guides provide the support you need to get up and running. The two examples below share the same EtherCAT network configuration:
- EtherCAT Cycle Time: 1 millisecond
- EtherCAT Mode: ECAT_SYNC
- Distributed Clock (DC): enabled, following the cycle time
In both examples the object(EthercatMaster master) represents the QEC-M-01, while the object(EthercatDevice_CiA402 motor) represents the Panasonic A6B Driver.
2.1 Profile Position (PP) Mode
The following program sets the Panasonic A6B Driver into CiA 402 Profile Position (PP) mode.
In setup() it initializes communication, configures the drive for PP mode, enables the motor, and sets the motion-profile parameters. In loop() a small state machine uses pp_Run() to command a target position and pp_IsTargetReached() to wait for completion, so the motor moves back and forth in a repeating cycle between 100000000 and -100000000 units.
#include "Ethercat.h"

EthercatMaster master;
EthercatDevice_CiA402 motor;
int pp_state = 0;

void setup() {
  Serial.begin(115200);
  Serial.print("Begin: "); Serial.println(master.begin());
  Serial.print("Slave: "); Serial.println(motor.attach(0, master));
  motor.setCiA402Mode(CIA402_PP_MODE);
  motor.setDc(1000000);
  Serial.print("Start: "); Serial.println(master.start(1000000, ECAT_SYNC));
  Serial.print("Enable: "); Serial.println(motor.enable());
  motor.pp_SetMotionProfileType(0); // Linear ramp (trapezoidal profile)
  motor.pp_SetVelocity(10000000);
  motor.pp_SetAcceleration(10000000);
  motor.pp_SetDeceleration(10000000);
}

void loop() {
  Serial.print("Pos: "); Serial.println(motor.getPositionActualValue());
  switch (pp_state)
  {
    case 0:
      if (motor.pp_Run(100000000) == 0)
        pp_state++;
      break;
    case 1:
      if (motor.pp_IsTargetReached())
        pp_state++;
      break;
    case 2:
      if (motor.pp_Run(-100000000) == 0)
        pp_state++;
      break;
    case 3:
      if (motor.pp_IsTargetReached())
        pp_state = 0;
      break;
  }
}
After uploading, open the Serial Monitor in the 86Duino IDE (match the baud rate).
On a successful EtherCAT configuration the Serial Monitor prints 0 and Enable: 0, then streams the motor’s current position while it cycles between the two target positions.
2.2 Cyclic Synchronous Position (CSP) Mode
The following program sets the Panasonic A6B Driver into CiA 402 CSP mode.
Motion is generated cyclically inside a callback (myCallback) registered with attachCyclicCallback(): once the drive reaches CIA402_OPERATION_ENABLED, each cycle adds 1000 units to the target position.
The setDc() call synchronizes the drive’s Distributed Clock with the 1 ms EtherCAT cycle, and loop() prints the motor’s current position.
#include "Ethercat.h"

EthercatMaster master;
EthercatDevice_CiA402 motor;
int32_t position = 0;

void myCallback() {
  if (motor.getCiA402State() != CIA402_OPERATION_ENABLED)
    return;
  motor.setTargetPosition(position += 1000);
}

void setup() {
  Serial.begin(115200);
  Serial.print("Begin: ");
Serial.println(master.begin());

  Serial.print("Slave: ");
Serial.println(motor.attach(0, master));

  motor.setCiA402Mode(CIA402_CSP_MODE);
  motor.setDc(1000000);
  master.attachCyclicCallback(myCallback);

  Serial.print("Start: ");
Serial.println(master.start(1000000, ECAT_SYNC));

  motor.setTargetPosition(position = motor.getPositionActualValue());
  Serial.print("Enable: ");
Serial.println(motor.enable());
}

void loop() {
  Serial.print("Pos: ");
Serial.println(motor.getPositionActualValue());
  // ...
}
On a successful EtherCAT configuration the Serial Monitor prints 0 and Enable: 0, then streams the motor’s current position as it advances by 1000 units each cycle.
*Note: For safety, the first target position is set to the current position — setTargetPosition(getPositionActualValue()) — at the beginning of enable, so the motor does not jump when it transitions to CIA402_OPERATION_ENABLED.
3. Complete Guides
If you’d like to dig deeper, the full step-by-step guides — including wiring photos, parameter checklists, and the 86EVA low-code workflow — are available below.
CSP mode:
- MINAS A6B Series (CSP mode) – Coding (Eng.)
- MINAS A6B Series (CSP mode) – Coding with 86EVA (Eng.)
- MINAS A6B シリーズ (CSPモード) コーディング (日本語)
- MINAS A6B シリーズ (CSPモード) 86EVAでのコーディング (日本語)
PP mode:
- MINAS A6B Series (PP mode) – Coding (Eng.)
- MINAS A6B Series (PP mode) – Coding with 86EVA (Eng.)
- MINAS A6B Series (PPモード)コーディング (日本語)
- MINAS A6B Series (PPモード) 86EVAでのコーディング (日本語)
We will continue to deliver robust and innovative EtherCAT automation platforms for smarter, faster integration. For questions or support, contact us at info@icop.com.tw, your local ICOP Branch, or a Worldwide Official Distributor.