[チュートリアル]
エンジニアおよびシステムインテグレーターの皆様が、 QEC-M-01 EtherCAT MDevice と Panasonic A6B シリ EtherCAT AC サーボモーター&ドライバーをすばやく使い始められるよう
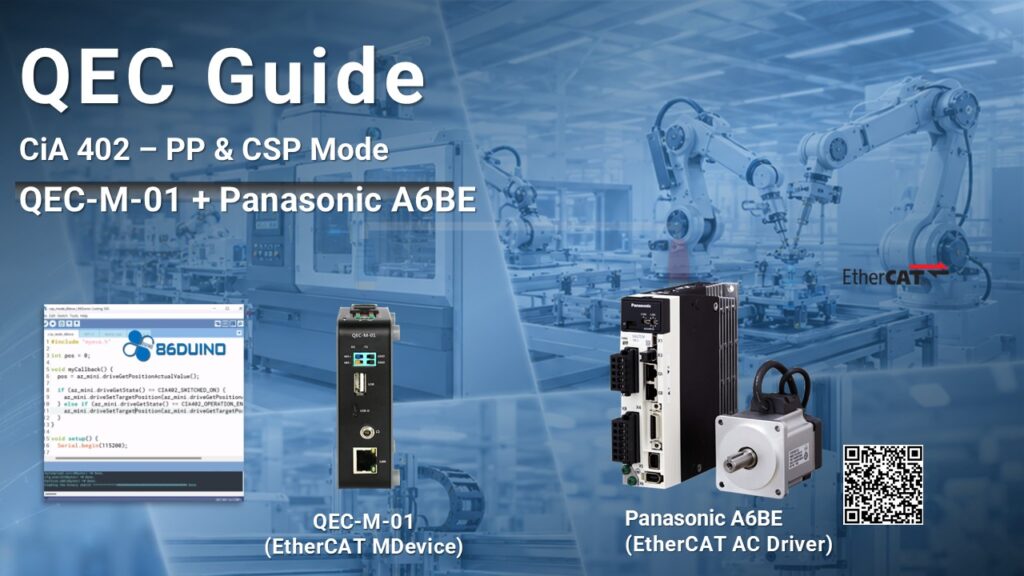
これらのガイドでは、ステップバイステップのセットアップ手順、実用的なコーディング例、そして Panasonic A6B を Cyclic Synchronous Position (CSP) および Profile Position (PP) の両モードで動作させるための統合のヒントを提供します。
1. 新しいガイドのハイライト
QEC-M-01 は、リアルタイムアーキテクチャを備えたコンパクトかつ強力な EtherCAT MDevice です。86Duino Coding IDE とその EtherCAT ライブラリと組み合わせることで、わずか 2 つの関数— setup() 一度きりの設定を行う と、周期的なメインプログラムを担う loop() だけで EtherCAT ネットワークを立ち上げ、CiA 402 サーボを駆動できます。
1.1 Panasonic A6B シリーズ(なぜ Panasonic A6B なのか?)
Panasonic A6B シリーズは、EtherCAT 上で標準的な CiA 402 オブジェクトを公開する、高性能で一体型の EtherCAT AC サーボモーター&ドライバーです。そのため、PP を実行する場合でも CSP を実行する場合でも、同じ QEC-M-01 のワークフローが適用できます
EtherCAT ユーザー向けのポイント:
- CiA 402 over EtherCAT — A6B は標準的な CiA 402 オブジェクトを公開し、PP と CSP の両方の操作をサポートするため、同一の QEC-M-01 コードベースをモードの切り替えだけで複数モードにわたって利用できます。
- 一体型サーボドライバー — 主電源入力(XA)、制御電源入力(XA1/XA2)、モーター/回生抵抗コネクタ(XB)が単一のコンパクトなドライバーに統合されており、200〜220 V AC 電源に対応します。
- 高解像度フィードバック — A6 エンコーダインターフェース(X6)が正確で安定した位置決めを提供し、Panasonic のオートチューニングにより立ち上げ調整を簡素化します。
- デイジーチェーン対応 EtherCAT ポート — EtherCAT 入力(X2A)と EtherCAT 出力(X2B)により、ドライバーをインラインで接続し、ネットワークをさらなる SubDevice へ拡張できます。
- 安全と保護 — ドライバーを有効にするには Safe Torque Off(STO、安全トルクオフ)インターフェース(X3)が有効である必要があります。加えて、センサーやアラーム処理のための I/O 信号インターフェース(X4)、LED ステータスインジケータ、ステーションエイリアス(station alias, ID)設定用のロータリースイッチを備えます。
詳細については、 Panasonic MINAS A6B 製品ページをご覧ください。
1.2 スタートガイドの利点
- ステップバイステップのセットアップガイド: 配線、EtherCAT ネットワークの立ち上げ、およびドライバー推奨のパラメータチェックリスト。
- プログラミング例(CSP / PP): 実用的で、すぐに実行できるコードスニペットと制御フローの例により、手書きコードと 86EVA ローコードの両形式でモーションをすばやく実装できます。
- 統合のヒントとトラブルシューティング: 現場でよくある問題——ドライブ有効化のシーケンス、開発中の STO ブリッジ(短絡)、QEC-M 環境の更新——に関する注意事項。
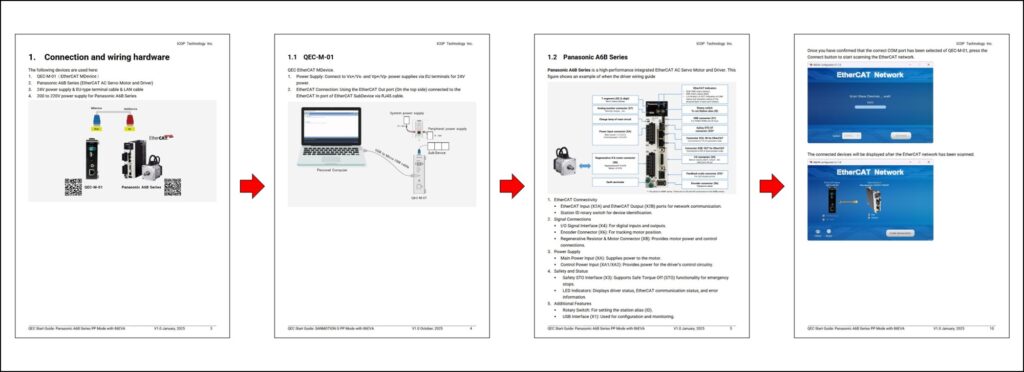
2. QEC-M-01 と Panasonic A6B AC サーボを使い始める
初心者の方でも経験豊富な開発者の方でも、これらのガイドは立ち上げに必要なサポートを提供します。以下の 2 つの例は、同じ EtherCAT ネットワーク構成を共有しています:
- EtherCAT サイクルタイム: 1 ミリ秒
- EtherCAT モード: ECAT_SYNC
- 分散クロック(DC): 有効、サイクルタイムに追従
どちらの例でも、EthercatMaster master) represents the QEC-M-01, while the object(EthercatDevice_CiA402 motor) represents the Panasonic A6B Driver.
2.1 プロファイルポジション(PP)モード
次のプログラムは、Panasonic A6B ドライバーを CiA 402 Profile Position(PP)モードに設定します。
setup() では通信を初期化し、ドライバーを PP モードに構成し、モーターを有効化し、モーションプロファイルのパラメータを設定します。 loop() では小さなステートマシンが で pp_Run() 標位置を指令し、 で pp_IsTargetReached() 完了を待機するため、モーターは 100000000 単位と -100000000 単位の間を繰り返し往復します。
#include "Ethercat.h"

EthercatMaster master;
EthercatDevice_CiA402 motor;
int pp_state = 0;

void setup() {
  Serial.begin(115200);
  Serial.print("Begin: "); Serial.println(master.begin());
  Serial.print("Slave: "); Serial.println(motor.attach(0, master));
  motor.setCiA402Mode(CIA402_PP_MODE);
  motor.setDc(1000000);
  Serial.print("Start: "); Serial.println(master.start(1000000, ECAT_SYNC));
  Serial.print("Enable: "); Serial.println(motor.enable());
  motor.pp_SetMotionProfileType(0); // Linear ramp (trapezoidal profile)
  motor.pp_SetVelocity(10000000);
  motor.pp_SetAcceleration(10000000);
  motor.pp_SetDeceleration(10000000);
}

void loop() {
  Serial.print("Pos: "); Serial.println(motor.getPositionActualValue());
  switch (pp_state)
  {
    case 0:
      if (motor.pp_Run(100000000) == 0)
        pp_state++;
      break;
    case 1:
      if (motor.pp_IsTargetReached())
        pp_state++;
      break;
    case 2:
      if (motor.pp_Run(-100000000) == 0)
        pp_state++;
      break;
    case 3:
      if (motor.pp_IsTargetReached())
        pp_state = 0;
      break;
  }
}
アップロード後、86Duino IDE でシリアルモニタを開きます(ボーレートを合わせてください)。
EtherCAT の設定が成功すると、シリアルモニタは 0 と を表示し、続いてモーターが 2 つの目標位置の間を往復する間、現在位置をストリーム表示します。
2.2 サイクリック同期位置(CSP)モード
The following program sets the Panasonic A6B Driver into CiA 402 CSP mode.
Motion is generated cyclically inside a callback (myCallback) registered with attachCyclicCallback(): once the drive reaches CIA402_OPERATION_ENABLED, each cycle adds 1000 units to the target position.
The setDc() call synchronizes the drive’s Distributed Clock with the 1 ms EtherCAT cycle, and loop() prints the motor’s current position.
#include "Ethercat.h"

EthercatMaster master;
EthercatDevice_CiA402 motor;
int32_t position = 0;

void myCallback() {
  if (motor.getCiA402State() != CIA402_OPERATION_ENABLED)
    return;
  motor.setTargetPosition(position += 1000);
}

void setup() {
  Serial.begin(115200);
  Serial.print("Begin: ");
Serial.println(master.begin());

  Serial.print("Slave: ");
Serial.println(motor.attach(0, master));

  motor.setCiA402Mode(CIA402_CSP_MODE);
  motor.setDc(1000000);
  master.attachCyclicCallback(myCallback);

  Serial.print("Start: ");
Serial.println(master.start(1000000, ECAT_SYNC));

  motor.setTargetPosition(position = motor.getPositionActualValue());
  Serial.print("Enable: ");
Serial.println(motor.enable());
}

void loop() {
  Serial.print("Pos: ");
Serial.println(motor.getPositionActualValue());
  // ...
}
EtherCAT の設定が成功すると、シリアルモニタは 0 と を表示し、続いてモーターが各サイクルで 1000 単位ずつ前進する現在位置をストリーム表示します。
*注: 安全のため、有効化の開始時に最初の目標位置を現在位置に設定します— setTargetPosition(getPositionActualValue()これにより、 に遷移す CIA402_OPERATION_ENABLED.
3. 完全ガイド
さらに詳しく知りたい方のために、配線写真、パラメータチェックリスト、86EVA ローコードワークフローを含む、完全なステップバイステップガイドを以下に用意しています。
CSPモード:
- MINAS A6B Series (CSP mode) – Coding (Eng.)
- MINAS A6B Series (CSP mode) – Coding with 86EVA (Eng.)
- MINAS A6B シリーズ (CSPモード) コーディング (日本語)
- MINAS A6B シリーズ (CSPモード) 86EVAでのコーディング (日本語)
PPモード:
- MINAS A6B Series (PP mode) – Coding (Eng.)
- MINAS A6B Series (PP mode) – Coding with 86EVA (Eng.)
- MINAS A6B Series (PPモード)コーディング (日本語)
- MINAS A6B Series (PPモード) 86EVAでのコーディング (日本語)
私たちは、よりスマートで迅速な統合を実現するため、堅牢で革新的な EtherCAT オートメーションプラットフォームを提供し続けます。ご質問やサポートが必要な場合は info@icop.com.tw、お近くの ICOP Branch、または 世界各国の正規代理店.