Once you are comfortable with the 86Duino software and using the built-in functions, you may want to extend the ability of your 86Duino with additional libraries.
What are Libraries?
Libraries are a collection of code that makes it easy for you to connect to a sensor, display, module, etc. For example, the built-in LiquidCrystal ライブラリ makes it easy to talk to character LCD displays. There are hundreds of additional libraries available on the Internet for download. The built-in libraries and some of these additional libraries are listed in the reference. To use the additional libraries, you will need to install them.
How to Install a Library
Libraries are often distributed as a ZIP file or folder. The name of the folder is the name of the library. Inside the folder will be a .cpp file, a .h file and often a keywords.txt file, examples folder, and other files required by the library.
Automatic installation
To install 3rd party libraries in the IDE, do not unzip the downloaded library and leave it as is.
In the 86Duino Coding, navigate to Sketch > Import Library. At the top of the drop-down list, select the option to “Add Library”.
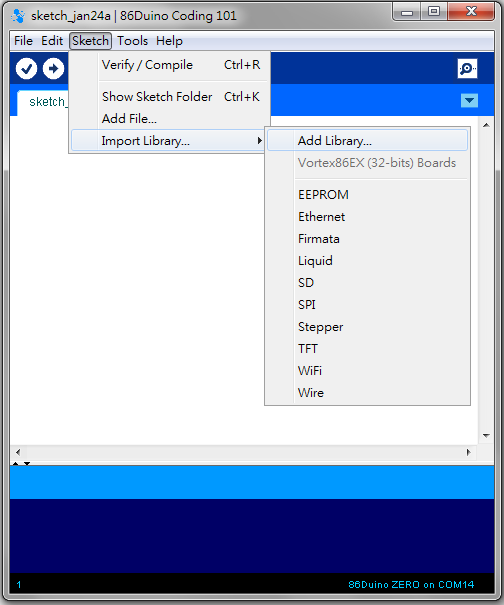
You will be prompted to select the library you would like to add. Navigate to the .zip file’s location and open it.
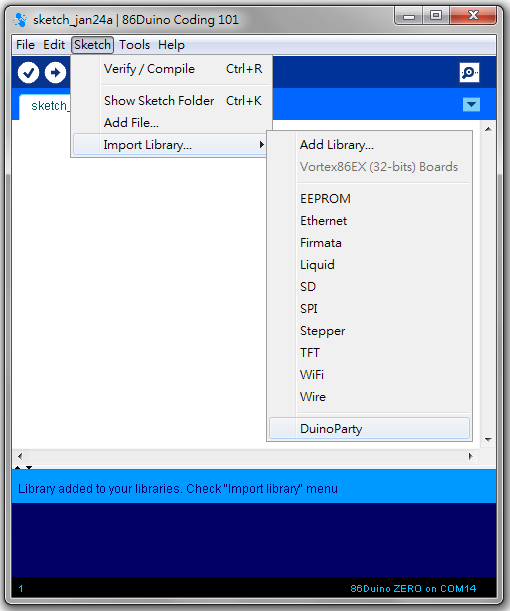
Return to the スケッチ > ライブラリをインクルード menu. You should now see the library at the bottom of the drop-down menu. It is ready to be used in your sketch.
The zip file will have been expanded in the libraries folder in your 86Duino sketches directory.
NB: the library will be available to use in sketches, but examples for the library will not be exposed in the File > Examples until after the IDE has restarted.
Manual installation
To install the library, first quit the 86Duino Coding application.
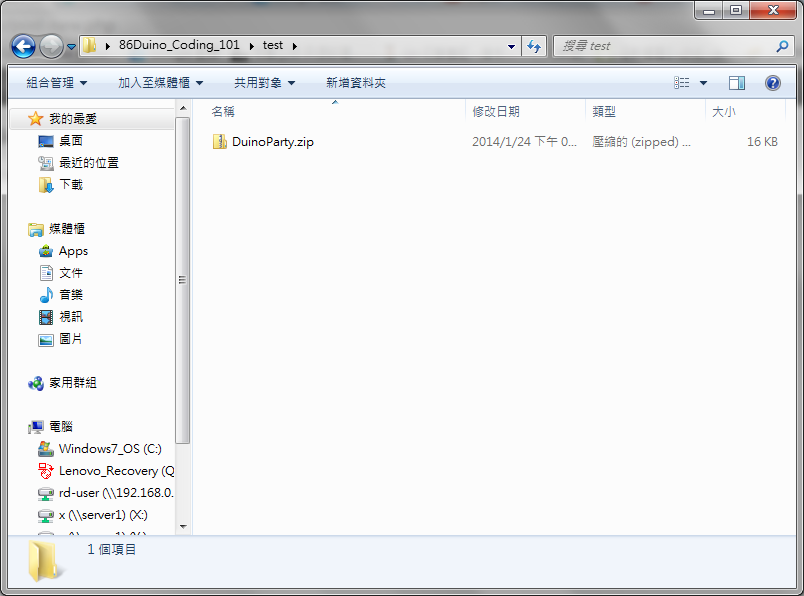
Then uncompress the ZIP file containing the library. For example, if you’re installing a library called “DuinoParty”, uncompress DuinoParty.zip. It should contain a folder called DuinoParty, with files like DuinoParty.cpp および DuinoParty.h inside. (If the .cpp および .h files aren’t in a folder, you’ll need to create one. In this case, you’d make a folder called “DuinoParty” and move into it all the files that were in the ZIP file, like DuinoParty.cpp および DuinoParty.h.)
Drag the DuinoParty folder into this folder (your libraries folder). Under Windows, it will likely be called “My Documents\86Duino\libraries”. For Mac users, it will likely be called “Documents/86Duino/libraries”. On Linux, it will be the “libraries” folder in your sketchbook.
Your 86Duino library folder should now look like this (on Windows):
My Documents\86Duino\libraries\DuinoParty\DuinoParty.cpp
My Documents\86Duino\libraries\DuinoParty\DuinoParty.h
My Documents\86Duino\libraries\DuinoParty\examples
....
or like this (on Mac):
Documents/86Duino/libraries/DuinoParty/DuinoParty.cpp
Documents/86Duino/libraries/DuinoParty/DuinoParty.h
Documents/86Duino/libraries/DuinoParty/examples
...
or similarly for Linux.
There may be more files than just the .cpp および .h files, just make sure they’re all there. (The library won’t work if you put the .cpp および .h files directly into the libraries folder or if they’re nested in an extra folder. For example:
Documents\86Duino\libraries\DuinoParty.cpp
および
Documents\86Duino\libraries\DuinoParty\DuinoParty\DuinoParty.cpp
won’t work.)
Restart the 86Duino Coding application. Make sure the new library appears in the Sketch->Import Library menu item of the software.
That’s it! You’ve installed a library!
Getting-Started Home
86Duino のリファレンスのテキストは Arduino レファレンス, and is licensed under a Creative Commons Attribution-ShareAlike 3.0 License下でライセンスされています。リファレンス内のコードサンプルはパブリックドメインとして公開されています。