本稿では、QEC MDevice(QEC-Mシリーズ製品)を最新バージョンの86Duino IDEにアップデートする方法を紹介します。このアップデートには、ブートローダー、EtherCATファームウェア、EtherCATツールの3つのアップデートが含まれます。
アップデートを実行する前に、次のハードウェアとソフトウェアを準備する必要があります。
ハードウェア:
- QEC-Mシリーズ製品(アップデート対象となるシステムです)
ソフトウェア:
- 86Duino IDE バージョン 500+ (またはそれ以降のバージョン)
アップデートを開始する
次に、アップデートの進め方についてさらに詳しく説明します。
ステップ1:QEC-Mのセットアップ
- 86Duino IDE 500(またはそれ以降のバージョン)をダウンロードしてインストールします。ダウンロードはこちらからできます。 ソフトウエア.
- QEC-M を接続する: USB ケーブルを使用して、QEC-M をコンピューターに接続します。
- 86Duino IDE を開く: インストールが完了したら、86Duino IDE ソフトウェアを開きます。
- ボードの選択: IDE メニューから、“Tools” > “Board” > “QEC-M-01”(または使用している QEC-M の特定のモデル) を選択します。
- ポートの選択: IDE メニューから “Tools” > “Port” を選択し、QEC-M が接続されている USB ポートを選択します。
86Duino IDE を初めて実行する場合は、この例を進める前に、Set up the QEC-M-043T for 86Duino – QEC を読むことをお勧めします。
ステップ2:「ブートローダーの書き込み」ボタンをクリックする
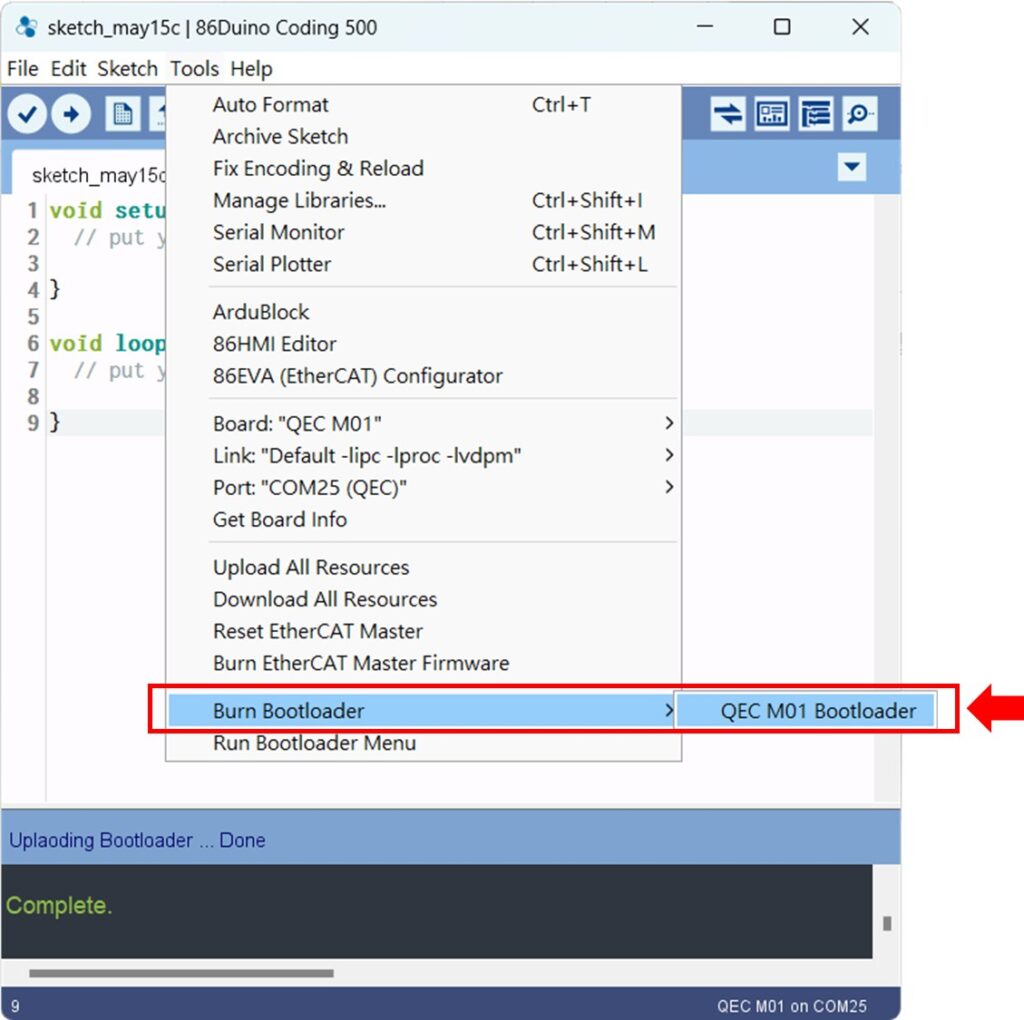
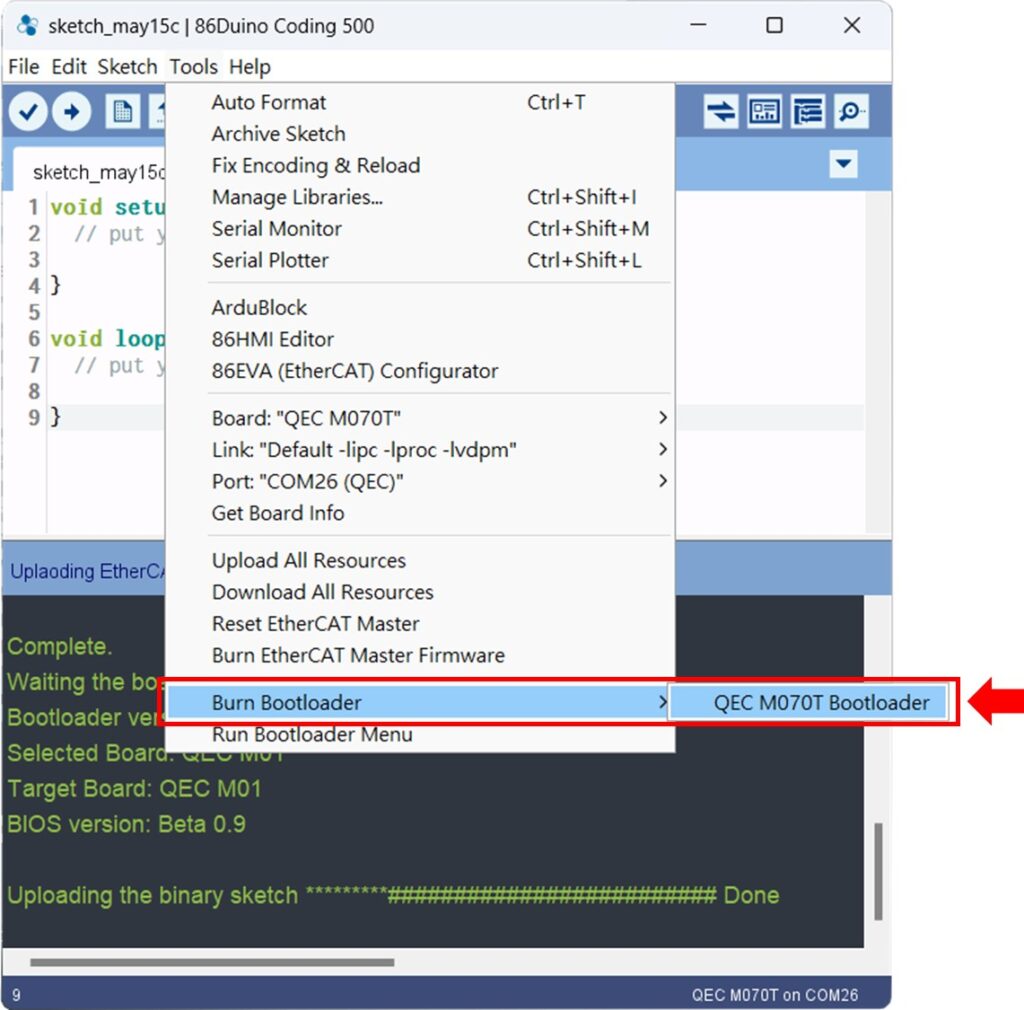
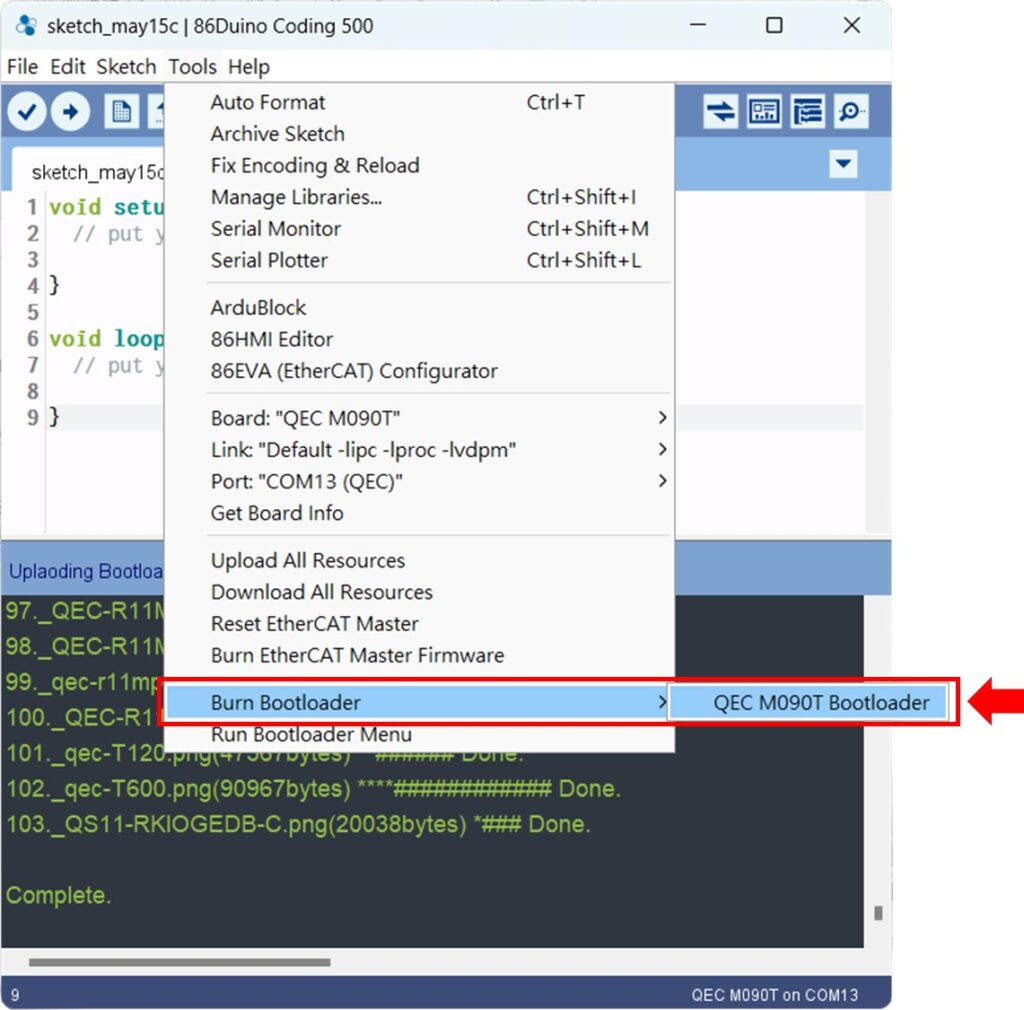
QEC-M製品に接続したら、“Tools” > “Burn Bootloader”に進みます。現在選択されているQEC-Mの名前が表示されます。それをクリックするとアップデートプロセスが開始され、約5~20分かかります。
QEC-M-01:
QEC-M-043T:

QEC-M-070T:
QEC-M-090T:
アップデートを完了する
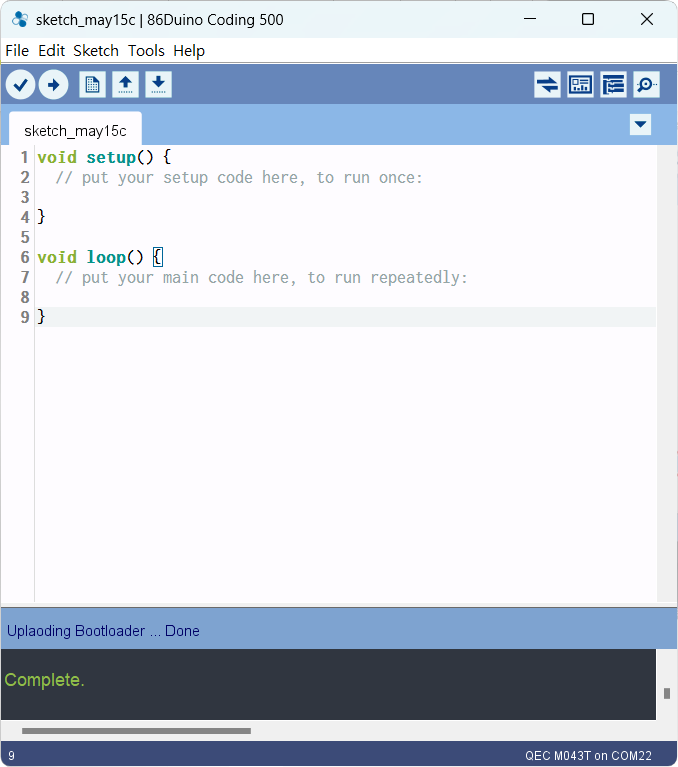
上記の手順を完了すると、QEC-M は開発環境の最新バージョンに正常に更新されます。
もっと詳しく知る
基本的な QEC アプリケーションの詳細については、EtherCAT アプリケーションを参照してください。
86Duino IDE プログラミングのより詳細なコレクションについては、言語またはライブラリを参照することもできます。