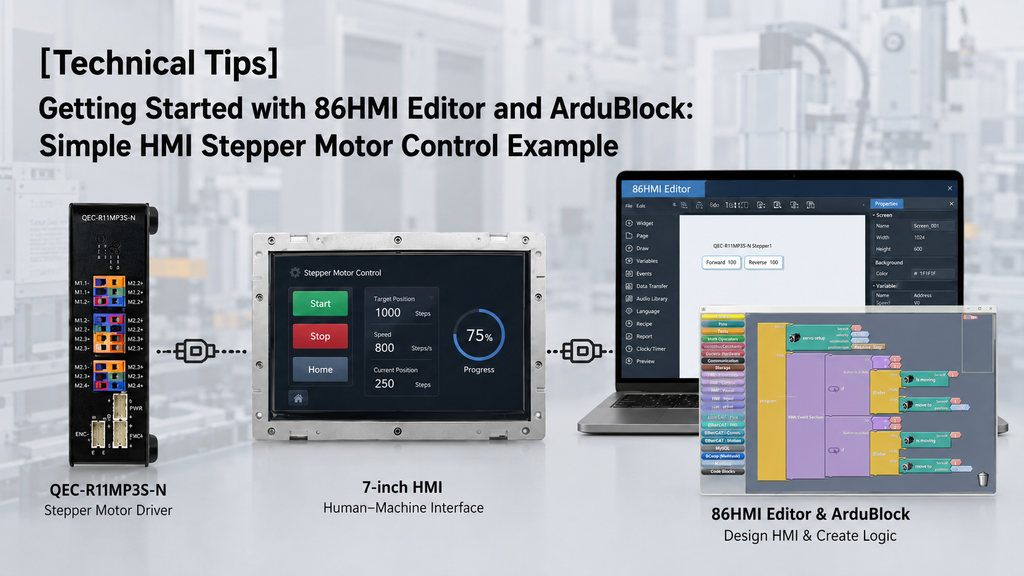
本範例說明如何在 86Duino 平台上快速實作步進馬達控制,內容涵蓋以 86HMI Editor 設計 HMI 按鈕,以及以 ArduBlock 進行拖放式程式設計。
對於初次接觸此平台的使用者,我們也提供逐步指南,協助您建置開發環境並開始第一個專案: 86Duino 新手上路
1. 硬體設定
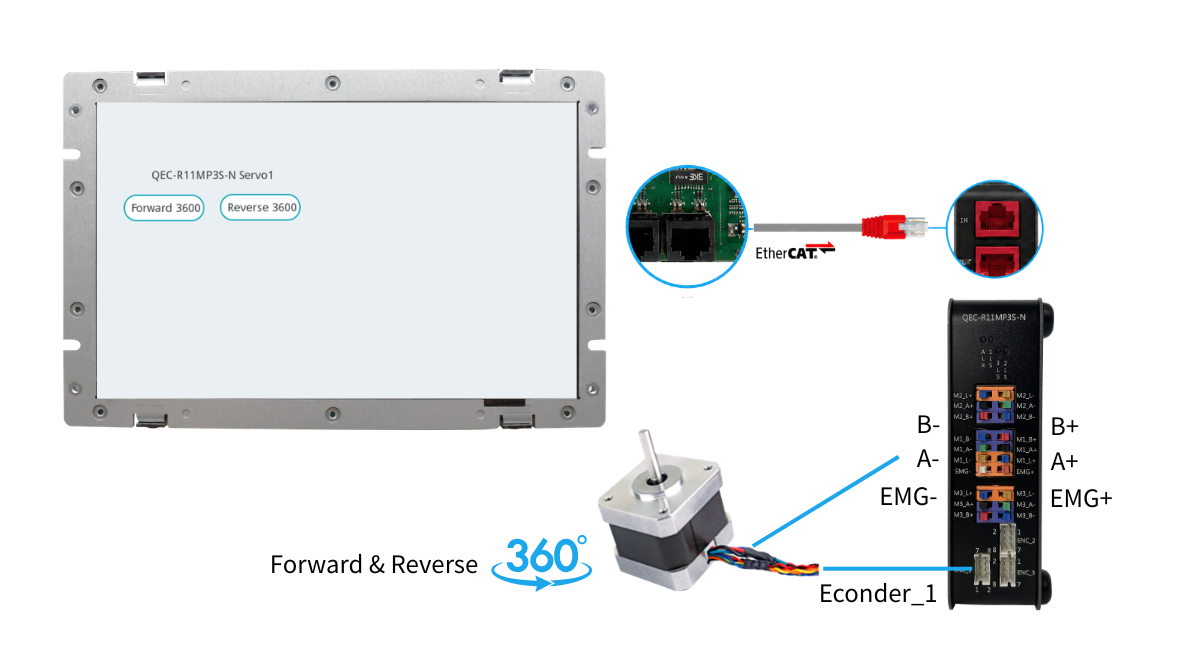
硬體配置以 QEC-M-070T 作為 EtherCAT MDevice 控制器,並以 QEC-R11MP3S-N 作為 SubDevice 步進馬達驅動器:
- QEC-M-070T – EtherCAT MDevice HMI 解決方案,用於介面設計與控制邏輯執行
- QEC-R11MP3S-N – 具 3 軸步進馬達控制器的 EtherCAT 運動控制模組
- 24V 電源
- 乙太網路線(用於 EtherCAT 通訊)
2. 實作步驟
實作流程可分為三個主要步驟。
- 首先,使用 86EVA 掃描並設定 EtherCAT 裝置。此步驟可確保所有連接的 EtherCAT 從站(slave)都被正確偵測並妥善設定。
- 接著,使用 86HMI Editor 設計 HMI 介面。介面可包含按鈕、文字,以及運動控制所需的其他視覺元件。
- 最後,使用 ArduBlock 建立控制邏輯。結合 EtherCAT 設定與 HMI 介面後,即可完成功能並透過 HMI 操作。
2.1 步驟 1 – 86EVA 設定工具
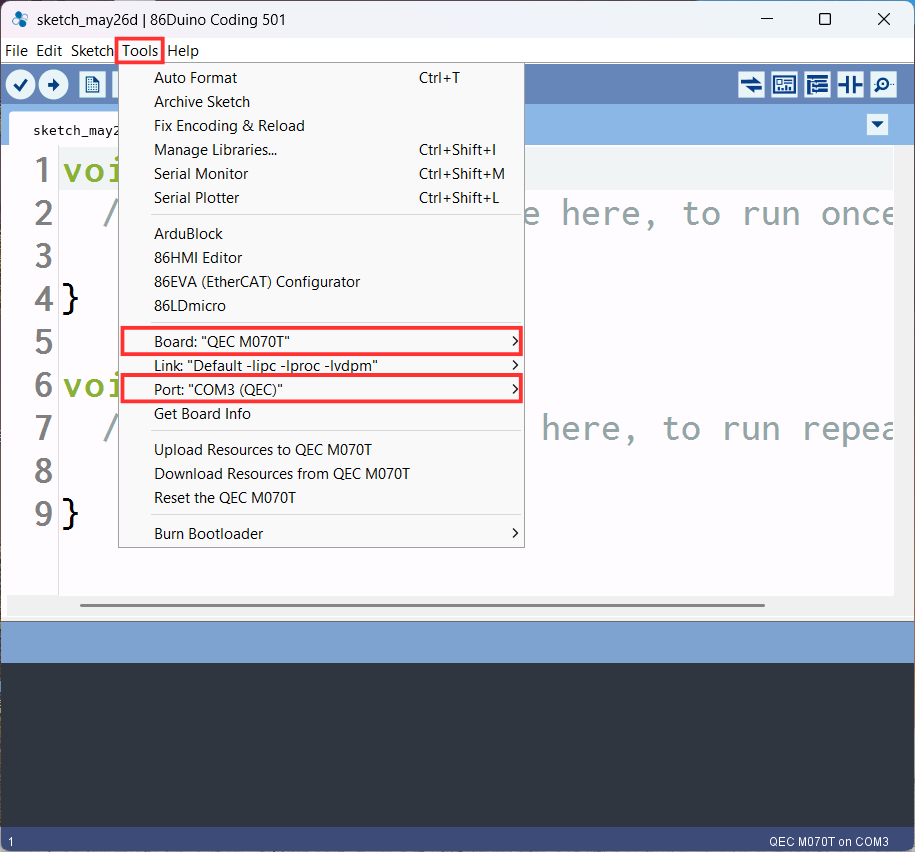
- 在「工具」選項中設定要使用的開發板與連接埠
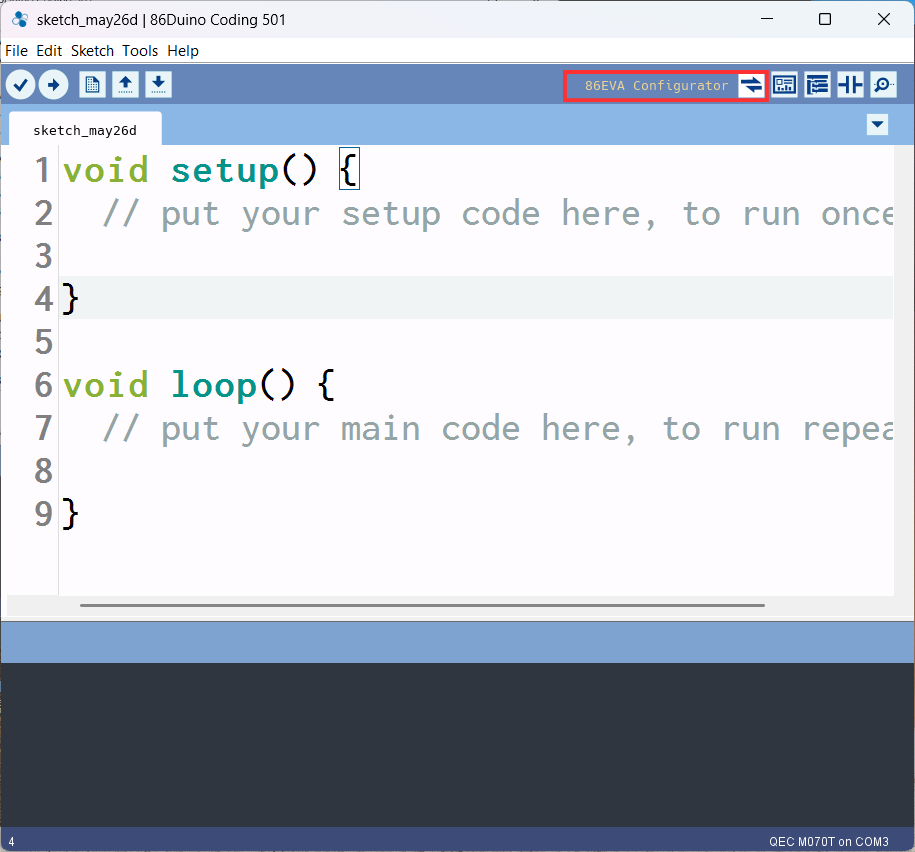
- 點選 86EVA 設定工具
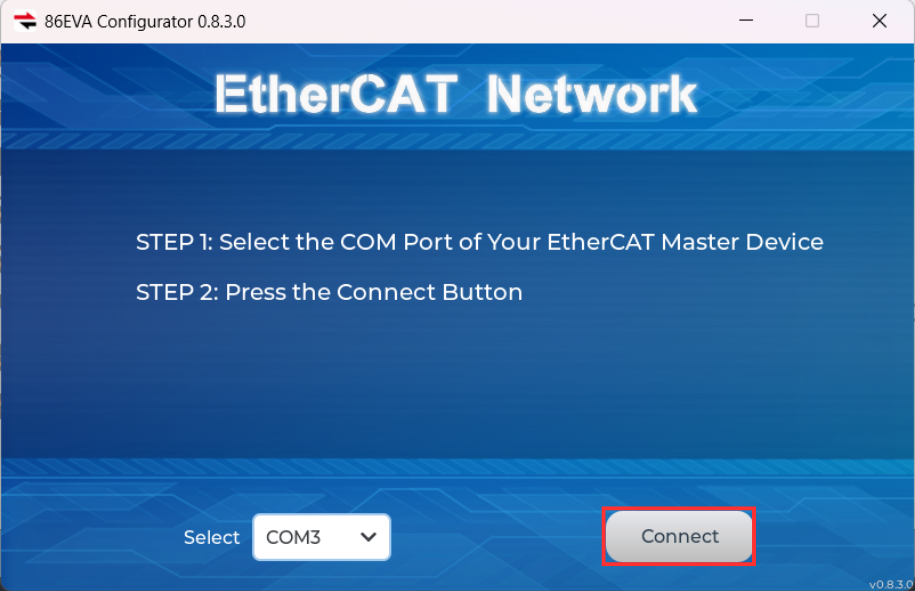
- 點選「Connect」以掃描裝置
- 掃描裝置中
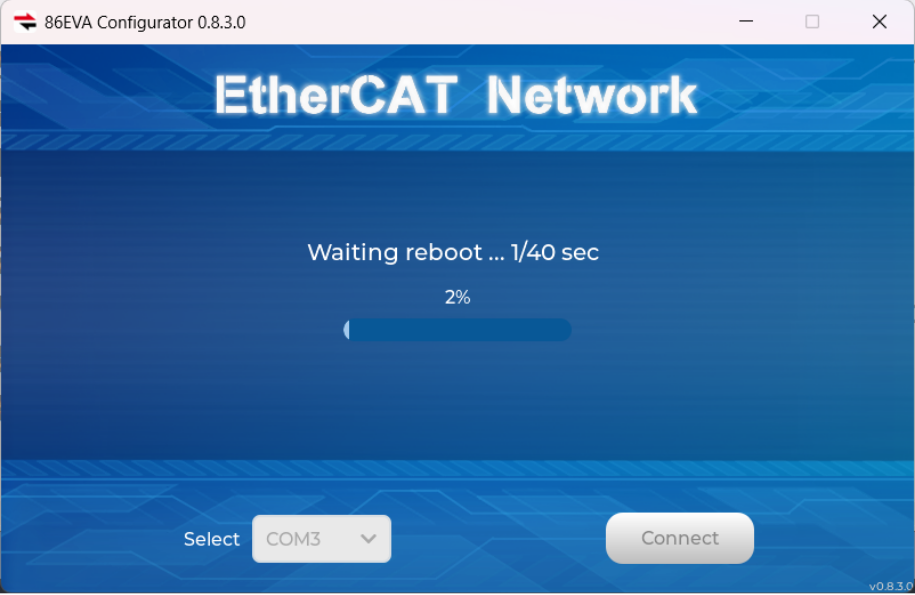
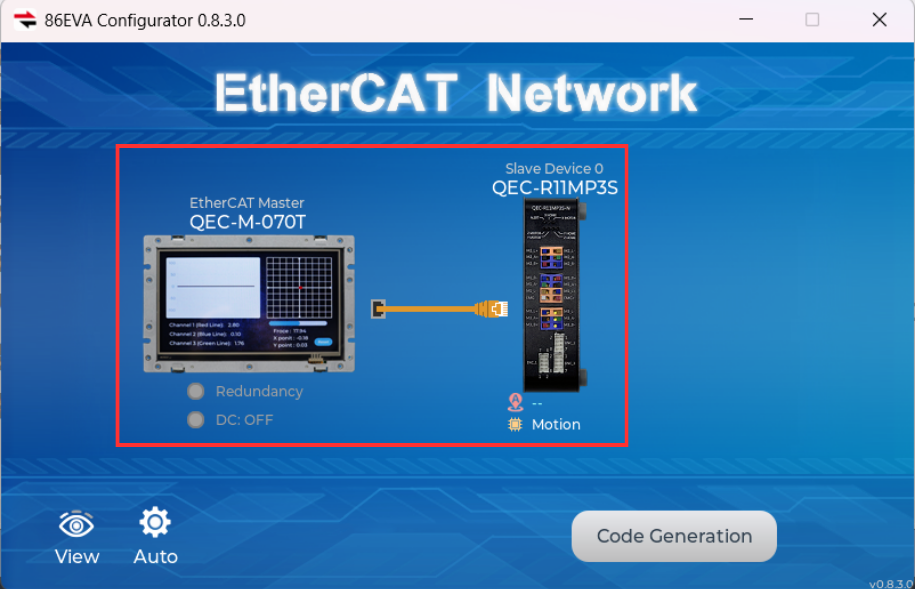
- 在 86EVA 網路中設定 QEC-M-070T 與 QEC-R11MP3S-N 裝置
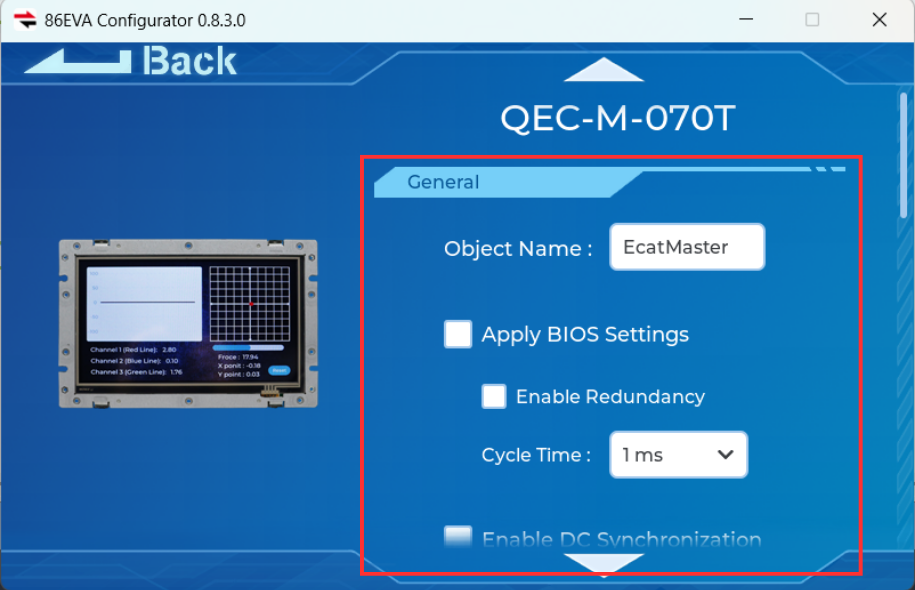
- 設定 QEC-M-070T 參數(如圖所示)
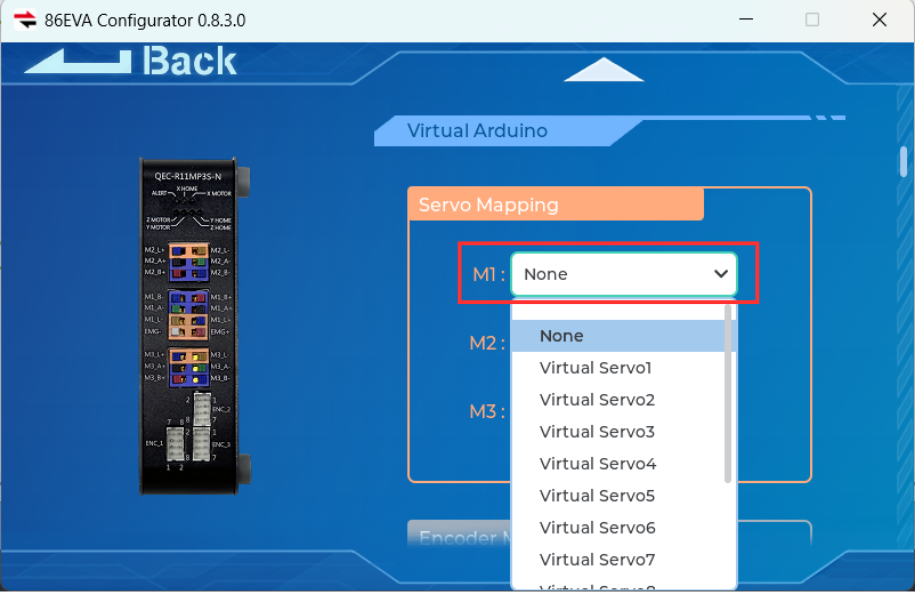
- 在伺服對應(servo mapping)中設定 QEC-R11MP3S-N 的 M1
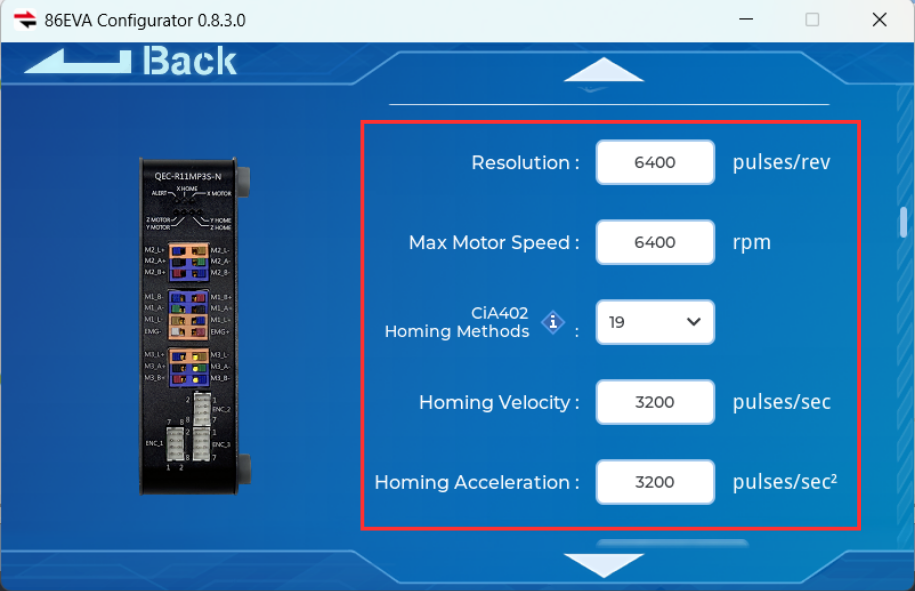
- 設定 servo 1 參數(如圖所示)
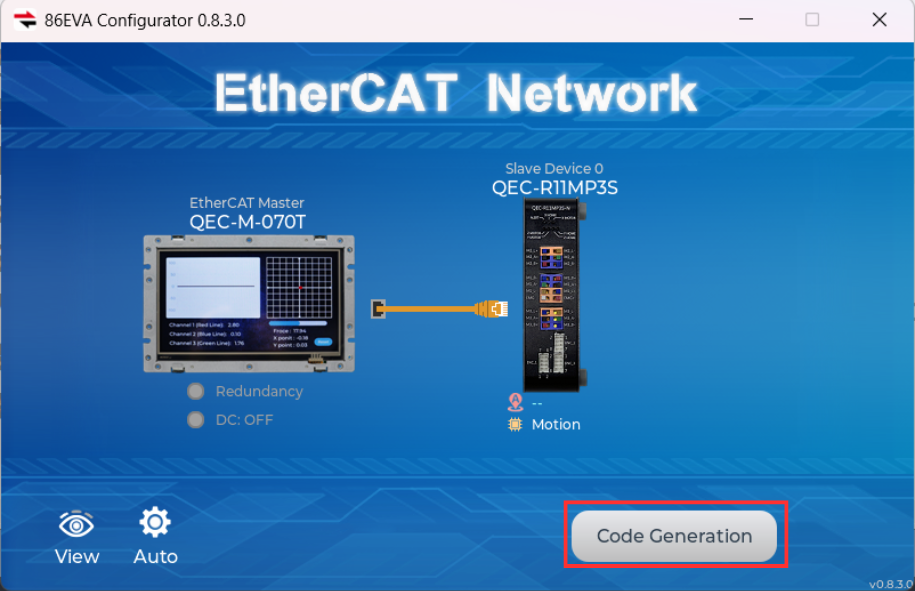
- 回到 86EVA,點選「Code Generation」
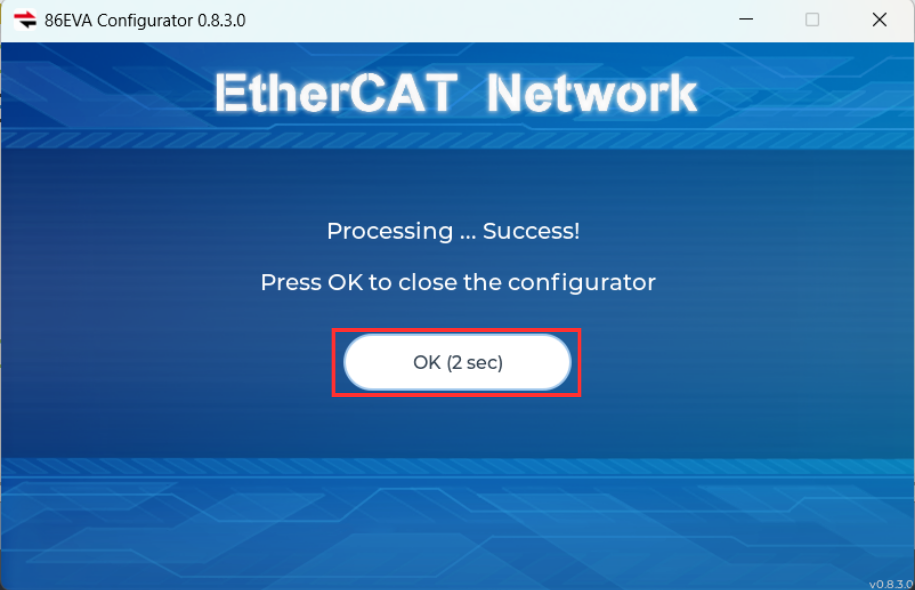
- 掃描完成後,點選「OK」確認
2.2 步驟 2 – 86HMI Editor 介面設計
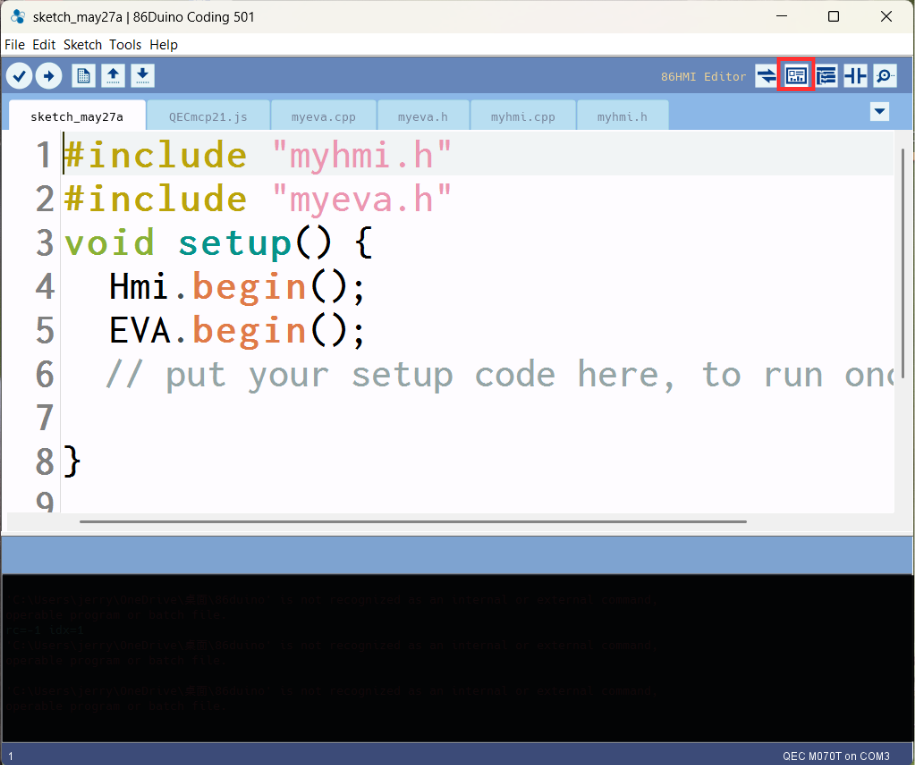
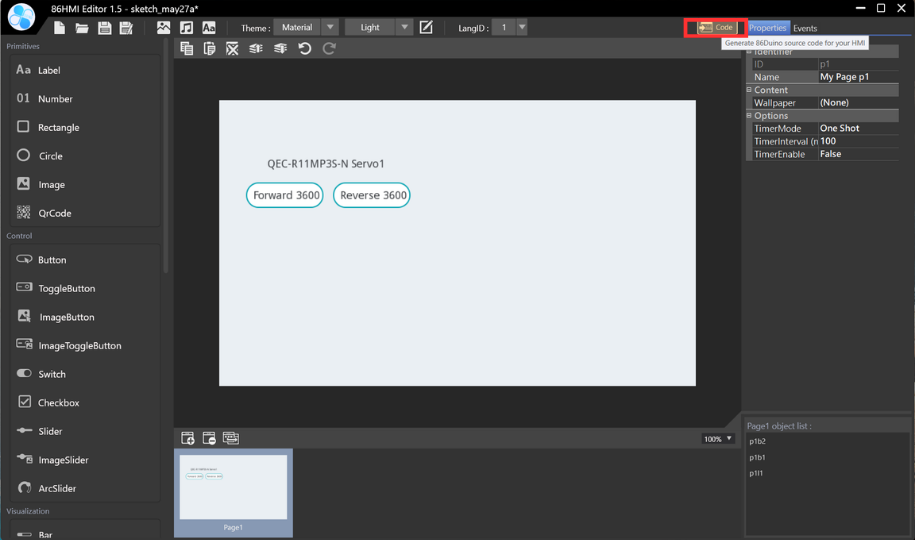
- 點選 86HMI Editor 工具
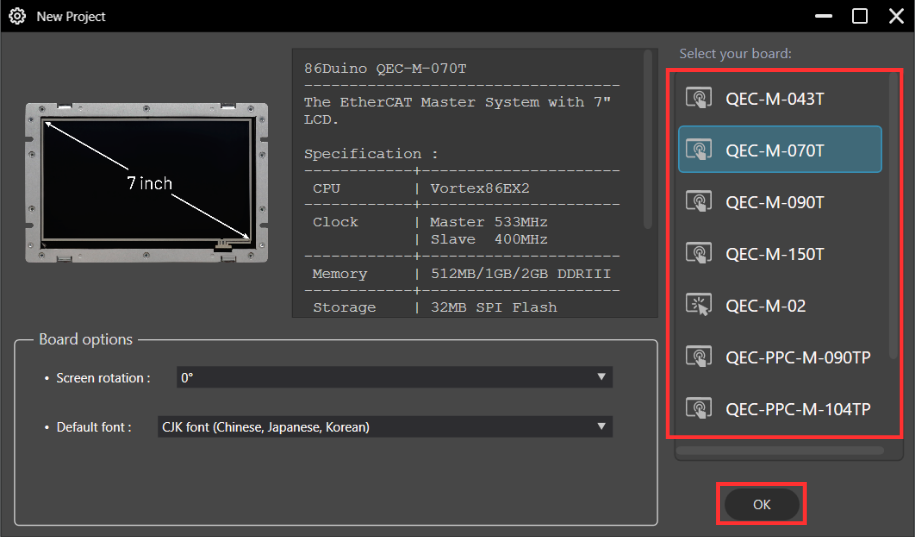
- 選擇開發板並點選「OK」
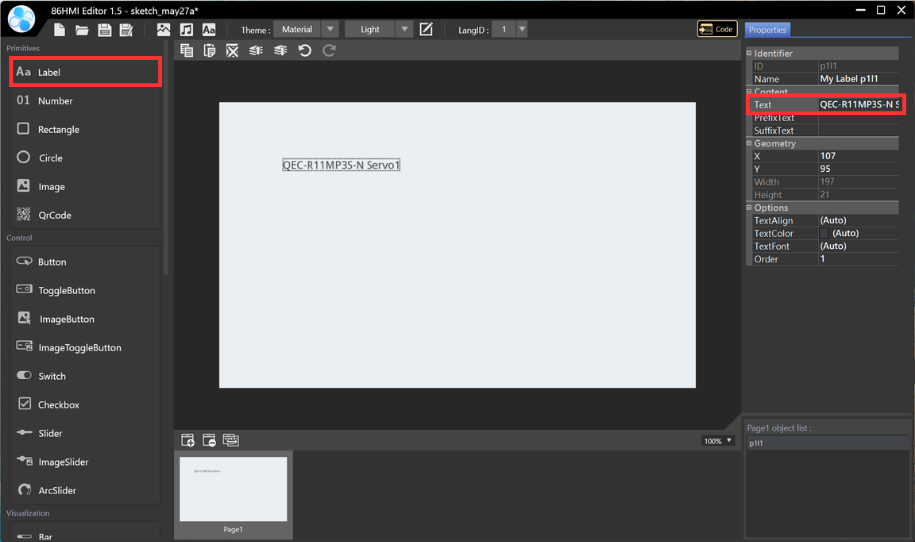
- 編輯文字:Label > Text(在欄位中輸入文字)
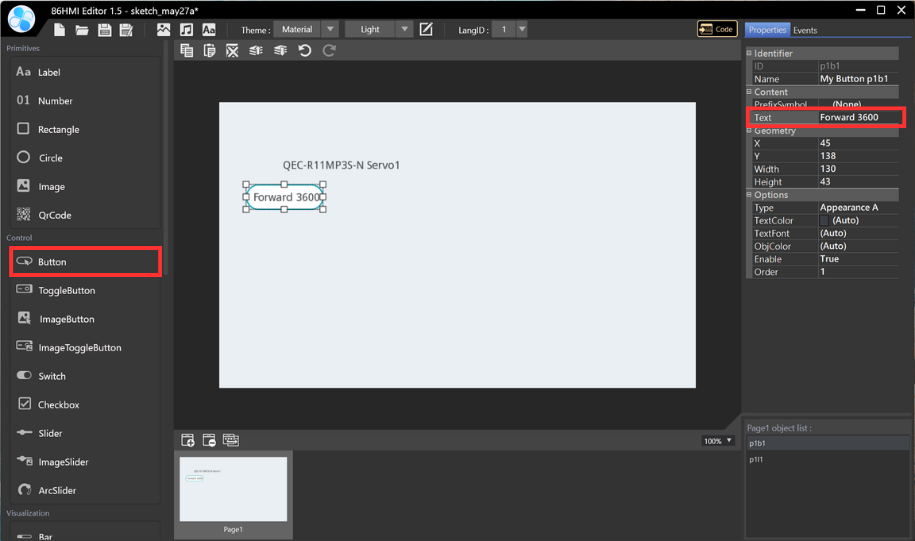
- 新增控制按鈕:Button(p1b1)> 編輯按鈕文字(在欄位中輸入文字)
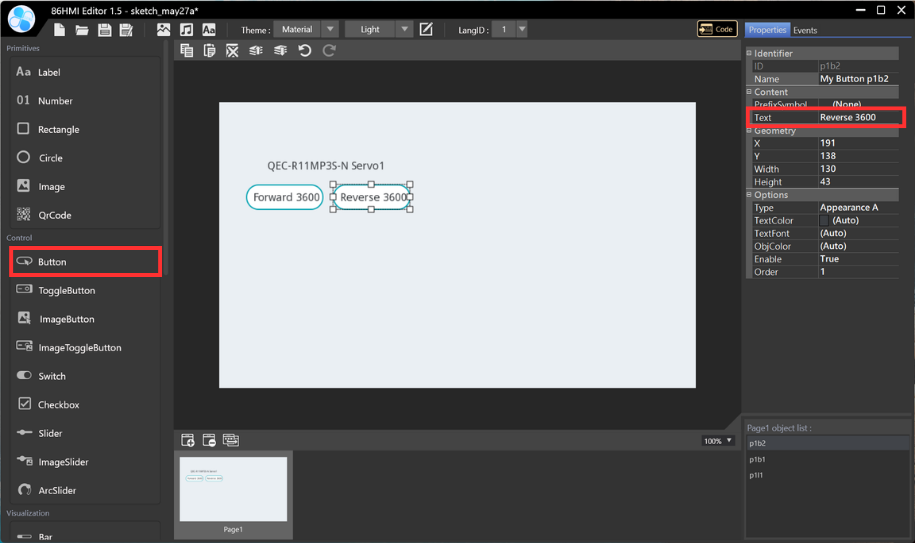
- 新增控制按鈕:Button(p1b2)> 編輯按鈕文字(在欄位中輸入文字)
- 上傳以產生範例內容
2.3 步驟 3 – ArduBlock 程式設計
- 點選 ArduBlock 工具
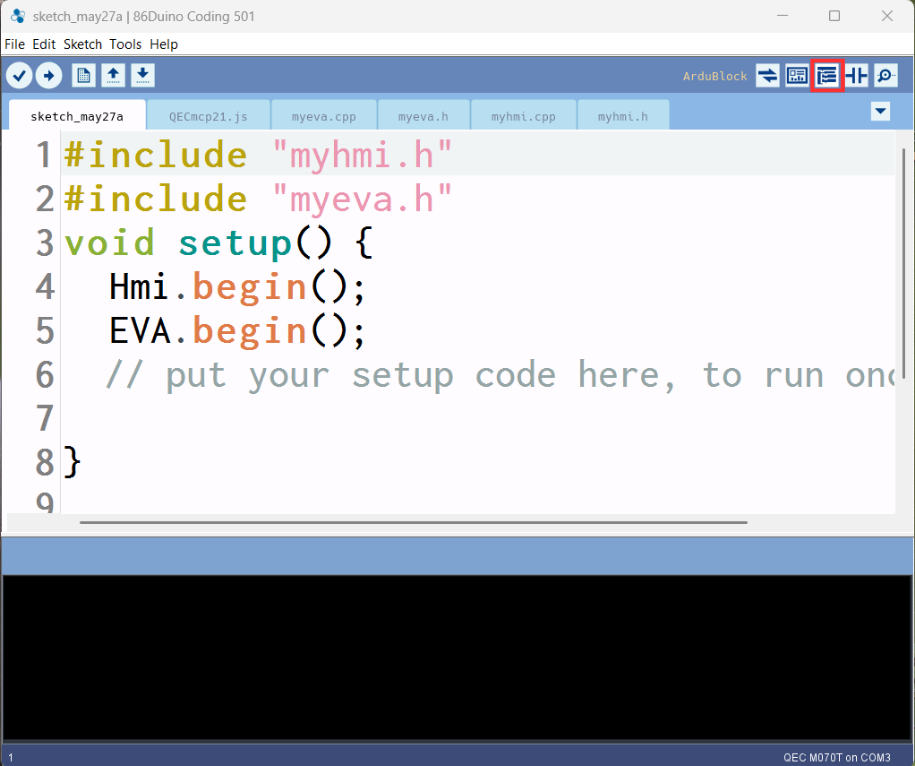
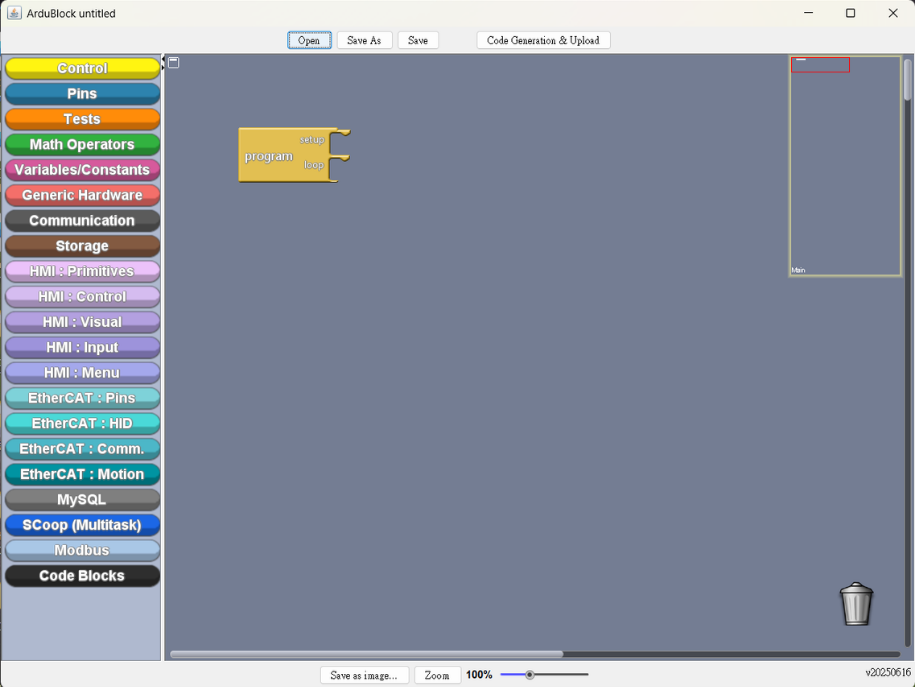
- ArduBlock 工作區
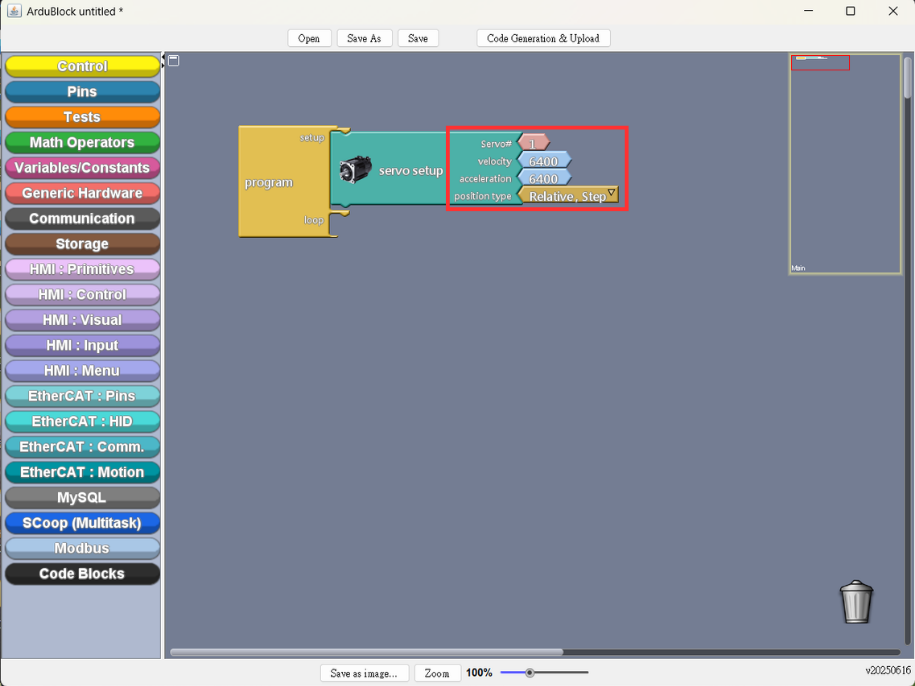
- EtherCAT 運動設定:EtherCAT.Motion > servo setup
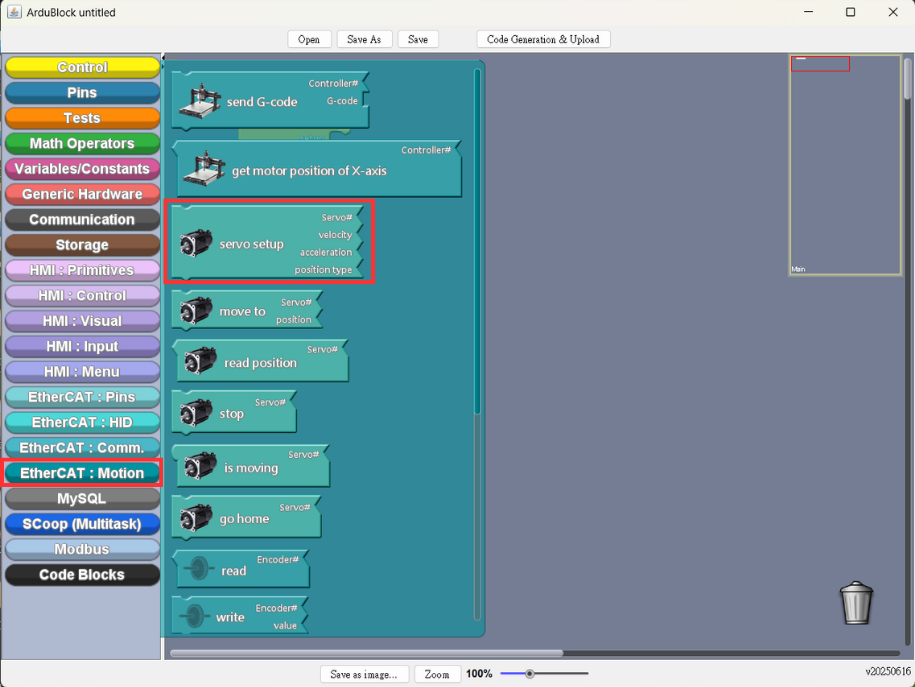
- 設定參數(如圖所示)
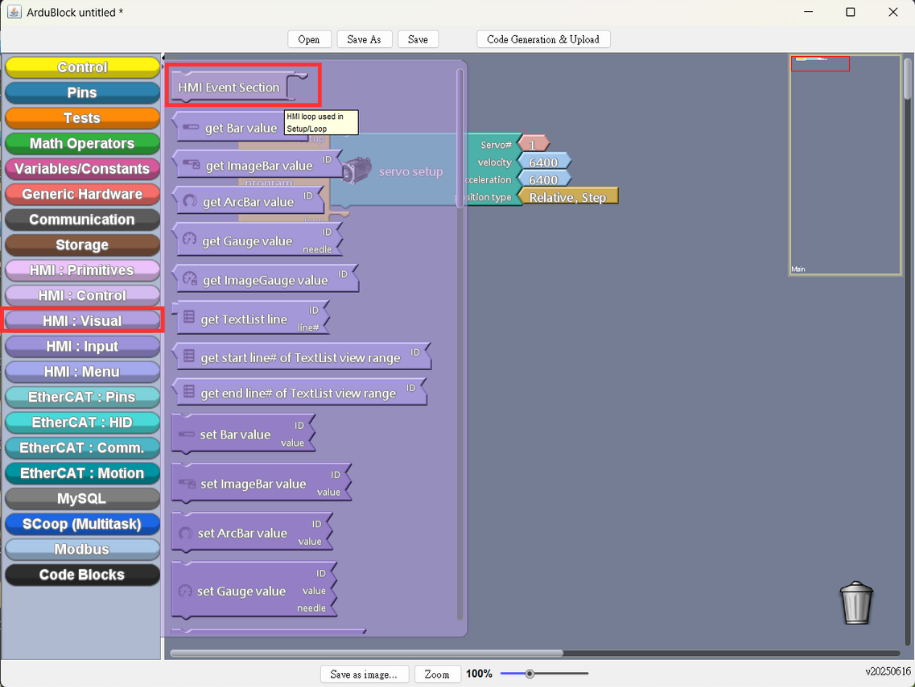
- 新增 HMI 視覺積木:HMI.Visual > HMI Event Section
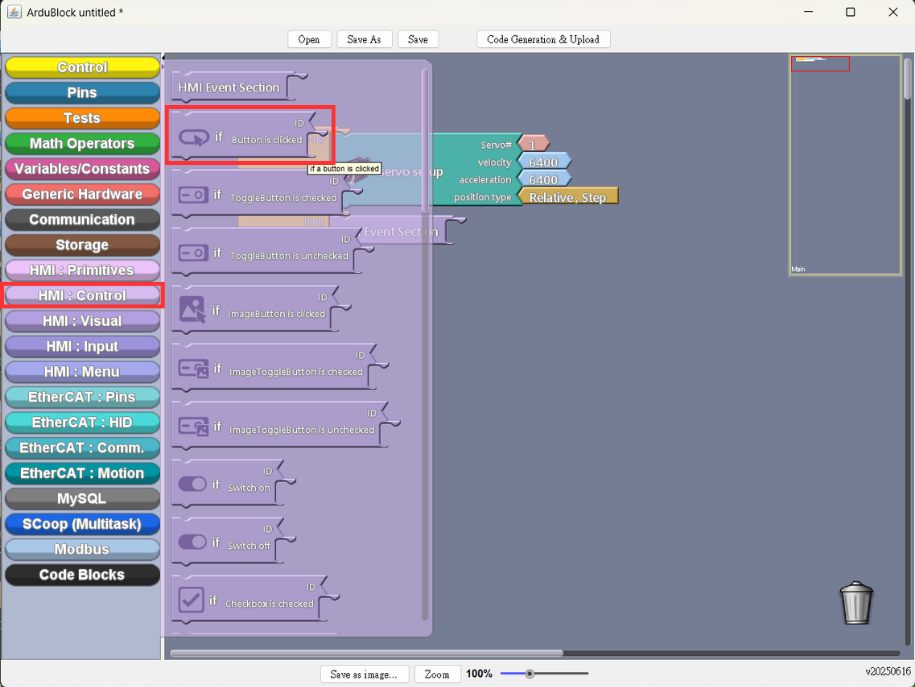
- 新增控制按鈕:HMI.Control > if Button is clicked
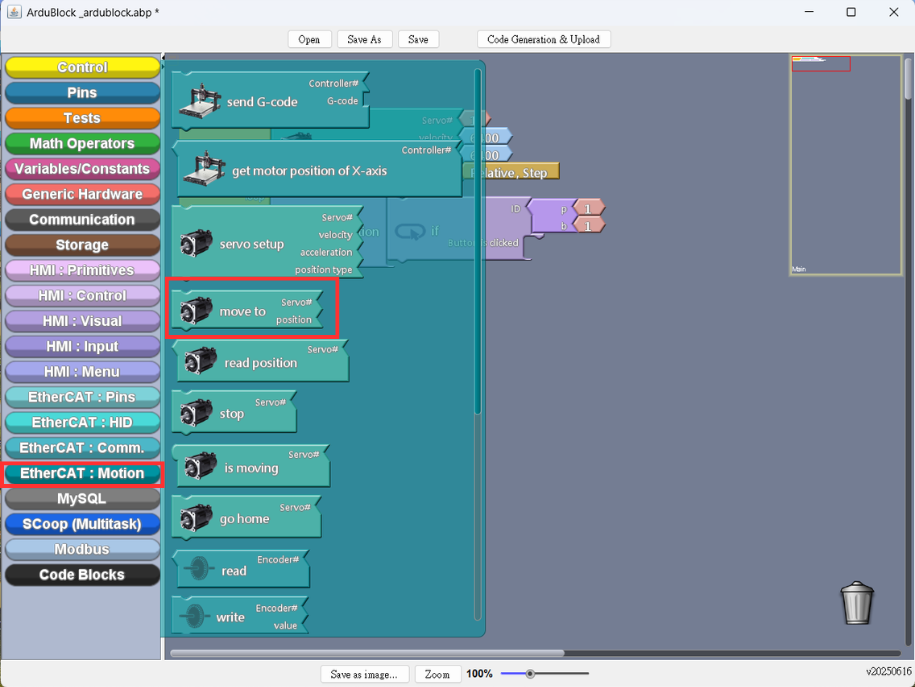
- EtherCAT 運動設定:新增 move to 積木
- 新增條件積木:while 積木
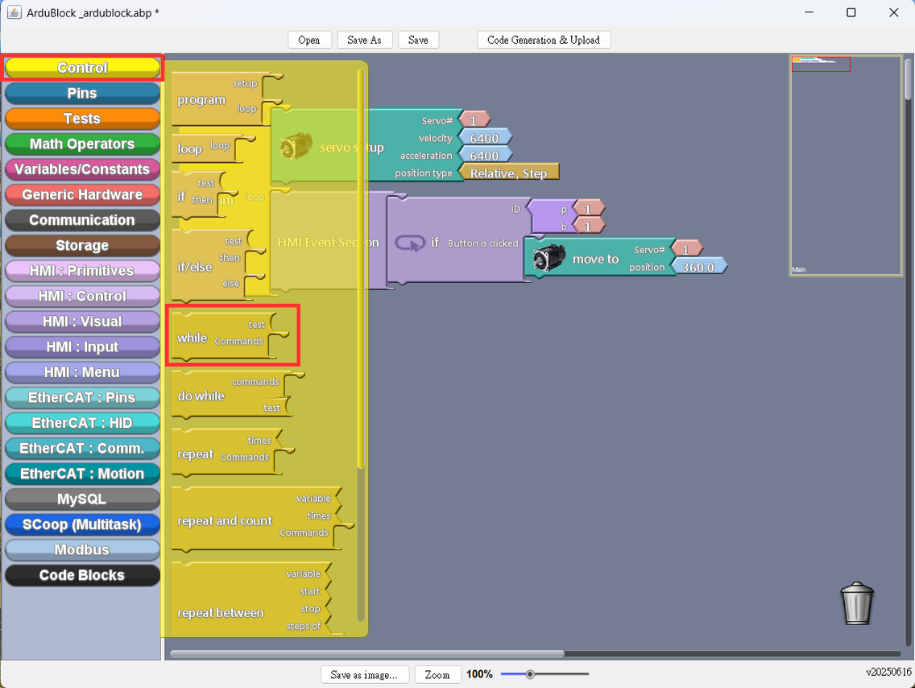
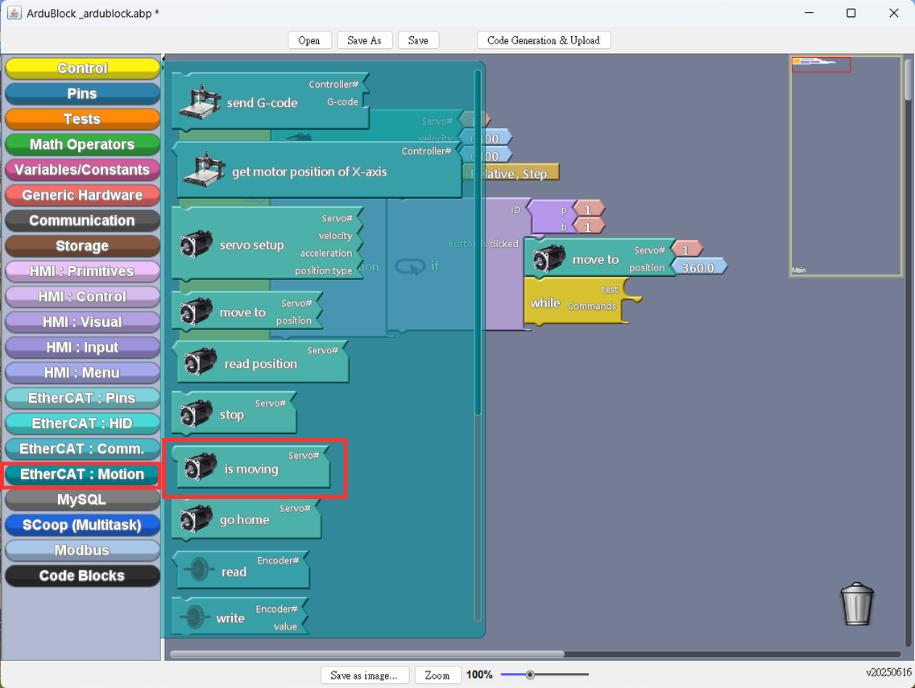
- EtherCAT 運動設定:新增 is moving
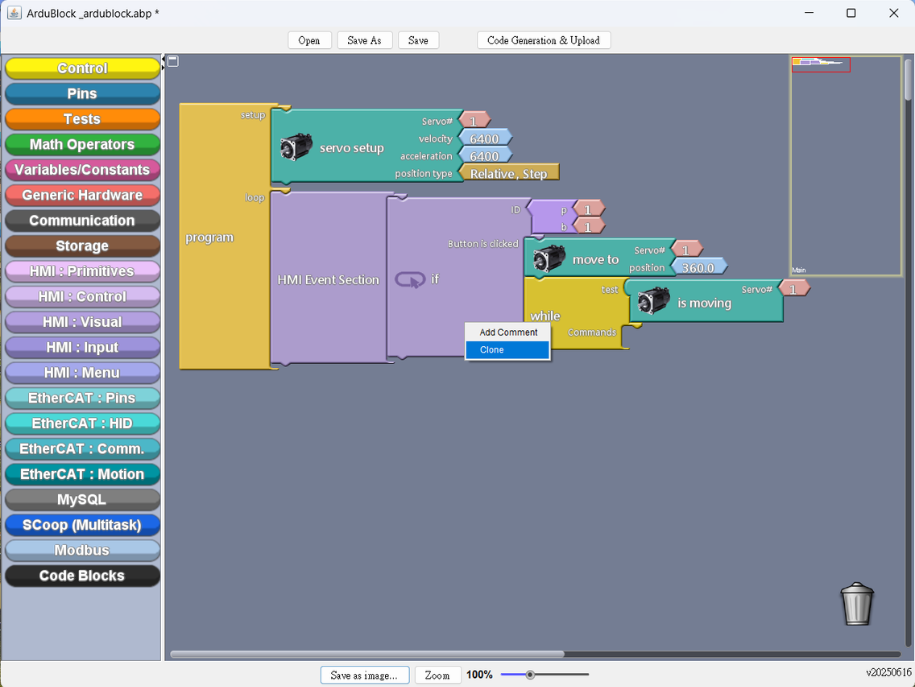
- 按右鍵複製整個控制積木(如圖所示)
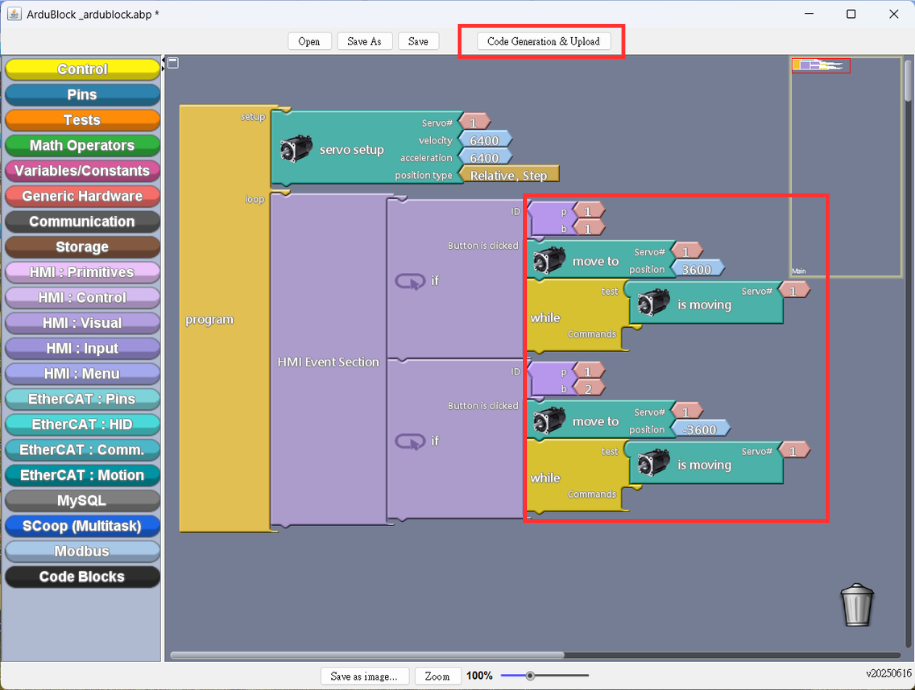
- 設定參數,並上傳以產生範例內容
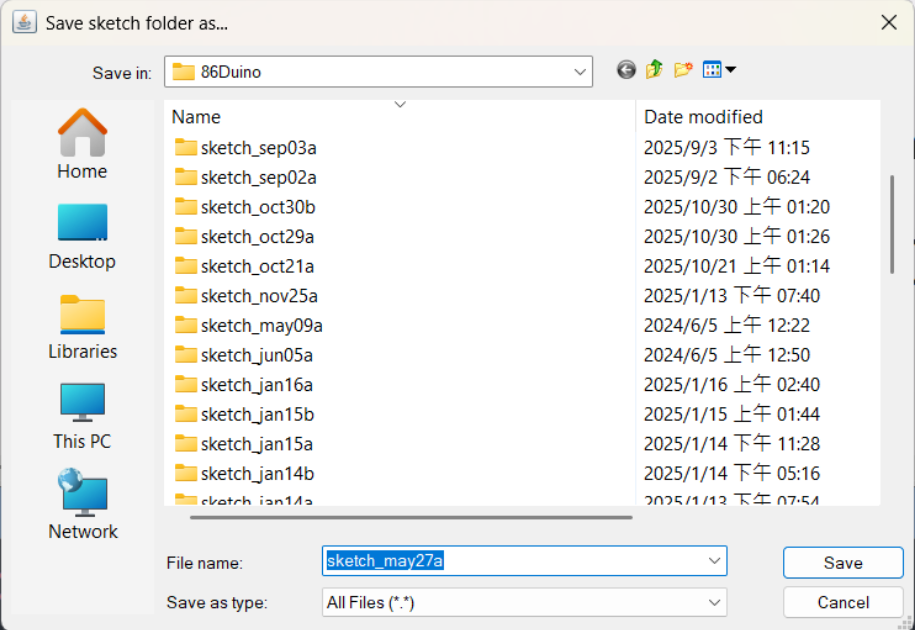
- 儲存草稿(請選擇要儲存的資料夾)
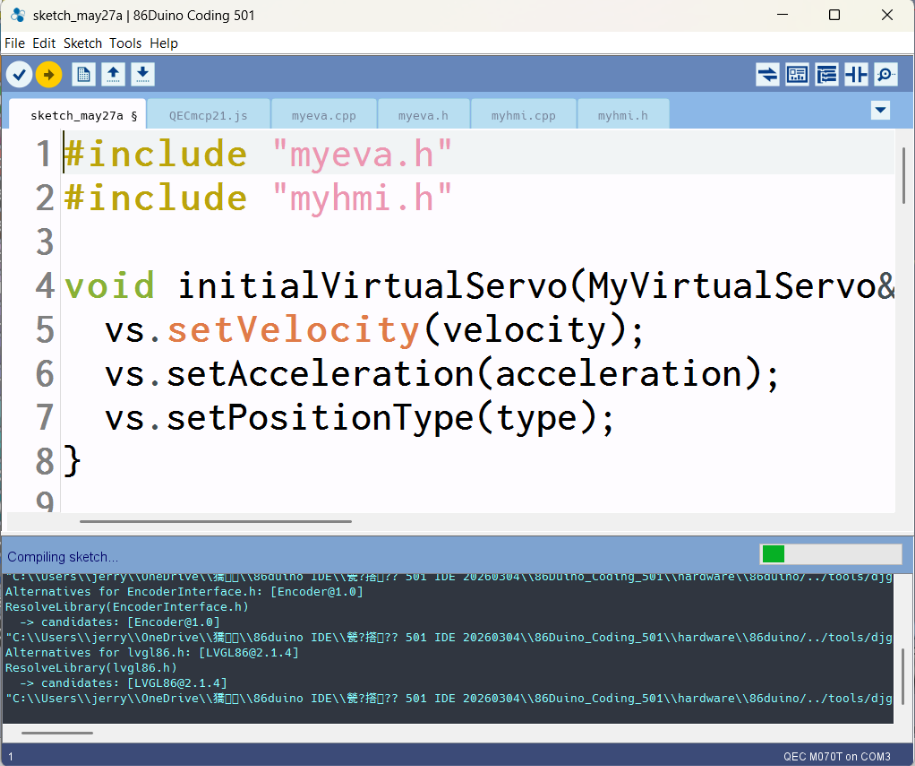
- 上傳並編譯 sketch
3. 展示結果
- 成果展示
如需更多資訊或樣品申請,請寄信至 info@icop.com.tw、致電最近的 ICOP 分支機構,或聯絡我們的全球官方經銷商。